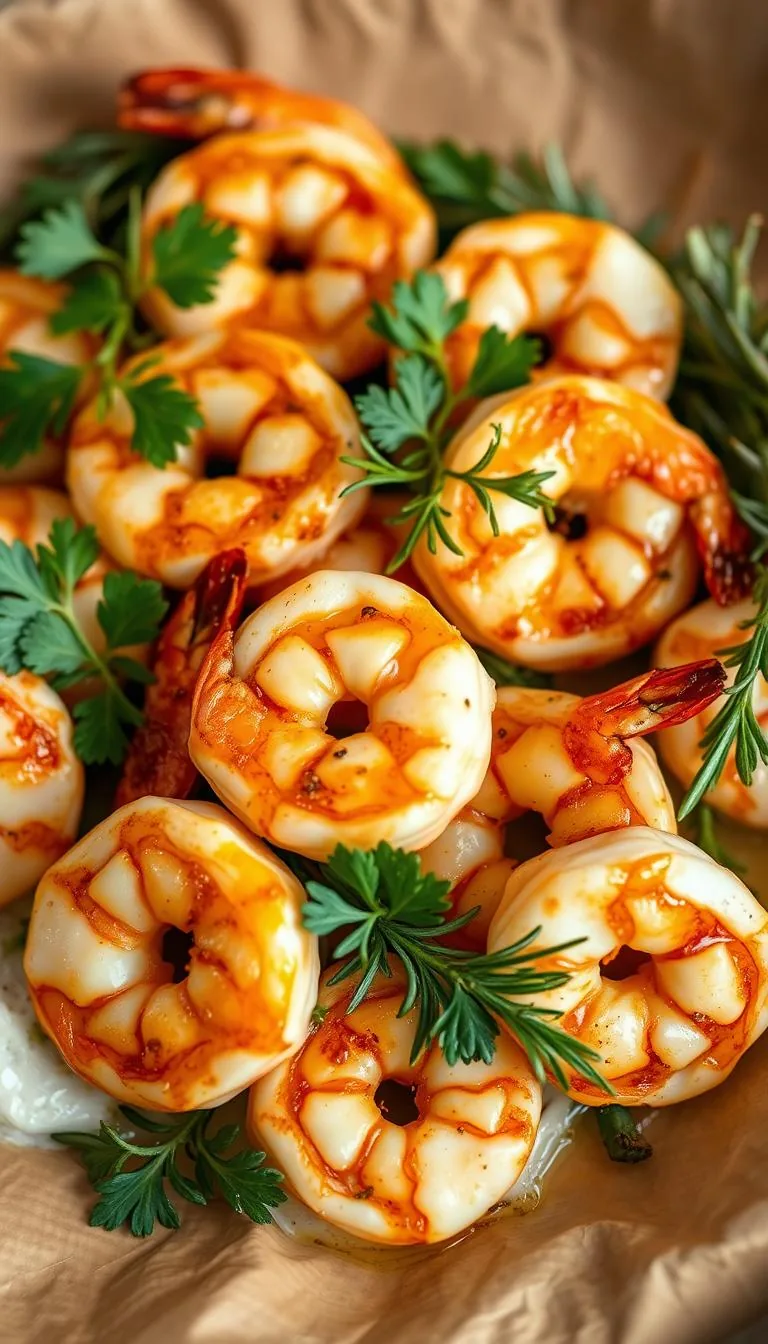
Welcome to my kitchen, friend! I'm excited to share this amazing baked garlic shrimp recipe with you. It's a favorite that always gets rave reviews!
This dish turns simple seafood into a gourmet delight. Your family and friends will want more, more, more! It's so easy to make, yet it's incredibly elegant.
You'll love the flavors of butter, fresh herbs, and spices. No need for fancy cooking skills! It's perfect for any occasion, whether it's a dinner party or a cozy night in.
The best part? It's ready in just 20 minutes. Most of that time, the oven does all the work! Let's get started and make something truly tasty together.
Key Takeaways
- Ready in just 20 minutes with minimal hands-on time
- Restaurant-quality results using simple ingredients
- Perfect for both weeknight dinners and special occasions
- No complicated cooking techniques required
- Impressive presentation that wows guests every time
- Uses fresh herbs and butter for rich, aromatic flavors
Why This Baked Shrimp Recipe Delivers Restaurant Results at Home
This recipe gets me excited because it brings restaurant style shrimp flavors right to your table. I've worked hard to perfect this method. Baking is the secret most home cooks miss.
Baking shrimp is magical. The gentle, even heat blends flavors perfectly. It keeps the shrimp tender and juicy. Unlike other methods, baking lets you control the outcome.
The garlic and herbs infuse into every bite. This creates amazing flavor layers, like a fancy seafood restaurant. Pulling the dish out of the oven is incredibly satisfying.
Baking beats other methods for several reasons:
| Cooking Method | Heat Control | Flavor Infusion | Texture Results | Cleanup Effort |
|---|---|---|---|---|
| Baking | Excellent - even heat distribution | Superior - flavors meld completely | Tender and juicy | Minimal cleanup required |
| Pan-frying | Moderate - requires constant attention | Good - surface flavoring mainly | Risk of overcooking | Moderate - oil splatter |
| Grilling | Challenging - hot spots common | Limited - some flavor loss | Can become tough | High - grill cleaning needed |
| Boiling | Poor - easy to overcook | Minimal - flavors wash away | Often rubbery | Low - simple pot washing |
The smell alone will draw everyone to your kitchen. That's the power of properly baked shrimp. It's more than just a meal; it's an experience.
This method lets you relax and enjoy your guests. You can prep ahead, bake, and then enjoy your dinner party. It's less stressful and more enjoyable.
Try this baking technique and you'll never cook shrimp another way. The results are always top-notch, and your friends will ask for the recipe!
Essential Ingredients for Perfect Baked Garlic Shrimp
The secret to amazing garlic butter shrimp is in the ingredients. This recipe is simple yet powerful. It uses just a few premium ingredients that blend together beautifully.
Each ingredient is key to the dish's restaurant-quality taste. When they combine, they create layers of flavor. This makes everyone want your recipe!
Choosing the Right Size and Type of Shrimp
Size is important for baked shrimp. I suggest using large or jumbo shrimp, about 21-25 count per pound. These shrimp are perfect for baking and offer meaty bites.
Fresh or frozen shrimp work well. Just thaw frozen shrimp before cooking. Wild-caught shrimp often tastes better than farm-raised, but both are delicious.
Choose shrimp that smell fresh and ocean-like. The shells should be firm and the meat springy.
Fresh Garlic vs. Pre-Minced: What Works Best
Fresh garlic is essential for this recipe. Pre-minced garlic just can't compare to fresh. It's a game-changer!
Fresh garlic releases oils when crushed, filling your kitchen with fragrance. Its flavor is sharper and more complex than pre-processed garlic.
Use 4-6 large garlic cloves for a pound of shrimp. Don't be shy with the garlic. It's the main attraction!
Selecting Fresh Herbs for Maximum Flavor
Fresh herbs make this dish special. I use parsley, thyme, and a bit of oregano. Together, they create a Mediterranean flavor that's unforgettable.
Parsley adds brightness and color. Thyme brings earthy notes. Oregano adds warmth. Choose herbs that are fresh and vibrant.
If you can't find all herbs, use parsley first. Dried herbs can't compare to the taste of fresh herbs in this garlic butter shrimp dish!
Kitchen Equipment and Preparation Tools
Having the right kitchen equipment makes your oven baked shrimp amazing! You don't need expensive tools. Just a few key pieces will help you cook better every time!
Being organized before cooking makes things easier. You'll feel more confident and relaxed with all your tools ready.
Baking Dishes and Pan Selection
Your choice of baking dish is key! I love using a shallow, wide ceramic or glass dish, like a 9x13 inch. This size lets shrimp cook evenly.
Shrimp need space to cook right. A crowded dish steams them instead of caramelizing. Ceramic dishes keep heat well and give great results.
Cast iron skillets are also great! They hold heat well and brown food beautifully. Plus, they look great when served straight from the oven.
Essential Prep Tools
Right prep tools make cooking oven baked shrimp easier! A sharp chef's knife is vital for mincing garlic. Dull knives make this hard and uneven.
You'll also need a strong cutting board, measuring spoons, and a mixing bowl. Good tongs are essential for flipping and serving.
I always have parchment paper ready. It makes cleanup easy and prevents sticking in your baking dish.
| Equipment Type | Recommended Option | Why It Works | Alternative Choice |
|---|---|---|---|
| Primary Baking Dish | 9x13 Ceramic Dish | Even heat distribution | Glass Pyrex Dish |
| Secondary Option | Cast Iron Skillet | Superior browning power | Stainless Steel Pan |
| Cutting Tool | Sharp Chef's Knife | Clean, precise cuts | Garlic Press |
| Serving Tool | Kitchen Tongs | Easy handling and serving | Slotted Spoon |
Preparing Your Shrimp Like a Professional
Getting your shrimp ready for baking is where the magic begins! We turn ordinary seafood into something truly special. Let's go through each step together, as if we're cooking in my kitchen.
Proper shrimp preparation is key to amazing results. These techniques will boost your cooking skills right away!
Safe Thawing Methods for Frozen Shrimp
Start with the right thawing method for frozen shrimp. Place them in a colander and run cold water over them for 10-15 minutes. This method keeps the shrimp's texture perfect.
Never thaw shrimp with hot water or the microwave. These methods can make the shrimp rubbery. Cold water is your best choice.
After thawing, dry the shrimp with paper towels. This step is important for a beautiful golden color.
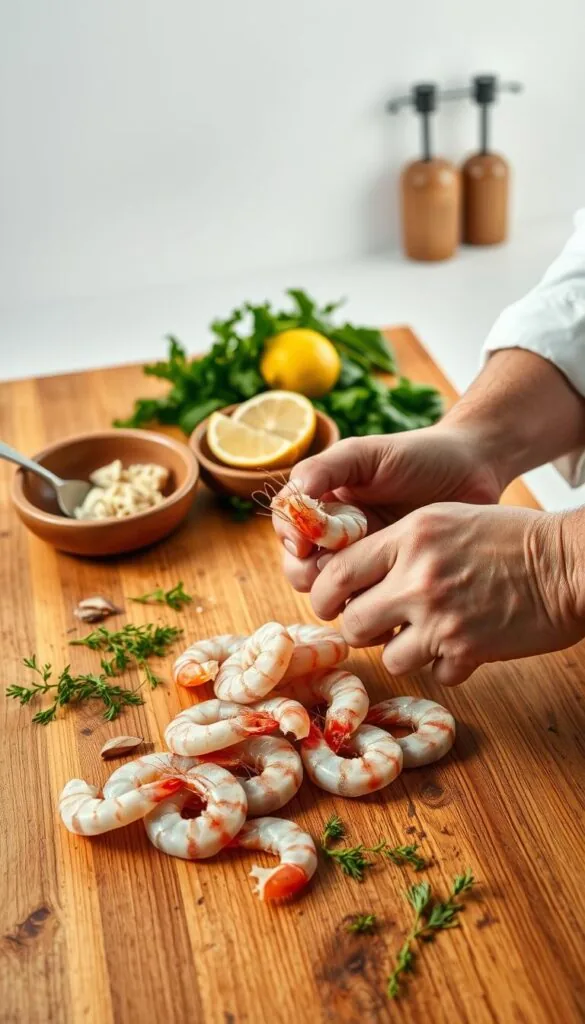
Proper Cleaning and Deveining Techniques
Don't worry if your shrimp aren't cleaned yet. I'll show you how easy it is! Remove the shell by gently pulling it off, starting from the legs. You can leave the tail on for a prettier look.
To devein, make a shallow cut along the shrimp's back. Rinse out the dark line under cold water. This shrimp cooking tip ensures clean, tasty results every time.
My secret is to rinse the shrimp in lightly salted water after cleaning. This removes grit and enhances their sweetness! Pat them dry again after rinsing.
Pre-Seasoning and Marinating Tips
Now, let's add flavor! Sprinkle salt and pepper lightly before adding the garlic herb mixture. The salt helps the flavors penetrate better.
For even better results, let the shrimp sit with the seasoning for 5-10 minutes. This brief marinating time lets the flavors work their magic.
These shrimp preparation steps are key to baking success. Your shrimp are now ready to soak up all the garlic and herb flavors we'll add next!
Creating the Ultimate Garlic Herb Butter Mixture
Making the perfect garlic herb butter is key to amazing baked shrimp. This special mix turns your dish into something truly special. Let's dive into the secrets that make it stand out!
This compound butter is all about balance. Fresh garlic adds a strong aroma. Herbs bring depth of flavor. And quality butter holds it all together, making your herb seasoned shrimp irresistible.
Butter Temperature and Consistency
Butter temperature is critical. You need room temperature butter that's soft but holds its shape. It should be easy to mash with a fork.
Don't use melted butter. It won't hold the herbs and garlic well. If your butter is too cold, let it sit for 30 minutes. Too warm? Chill it for 5-10 minutes.
The ideal consistency is like soft clay. This makes blending all the ingredients smooth and even.
Balancing Garlic Intensity
Customize your garlic herb butter to your liking! Use 4-6 garlic cloves for half a cup of butter. Adjust to your taste.
Mince your garlic finely. This ensures every shrimp bite is flavorful without harsh chunks. Fresh garlic is always better for flavor.
Let minced garlic sit for 2-3 minutes before mixing. This enhances the flavor even more!
Fresh Herb Integration Techniques
Fresh herbs make your shrimp burst with flavor! Mix parsley, thyme, and a pinch of oregano. Parsley adds brightness, thyme earthiness, and oregano a Mediterranean touch.
Chop herbs just before mixing to keep their oils fresh. Roll parsley into tight bundles to preserve color and freshness.
Fold everything gently with a fork. Add lemon juice, salt, and pepper. The mix should be speckled with herbs and smell amazing!
Step-by-Step Baked Garlic Shrimp Cooking Process
This is where the magic happens - turning your beautifully seasoned shrimp into an incredible baked shrimp dish! I absolutely love this part because you can actually see your hard work transform into something spectacular. The aroma alone will have everyone gathering in your kitchen!
Let me walk you through each step so you get perfect results every single time. Trust me, once you follow this process, you'll be making this easy shrimp dinner on repeat!
Oven Preheating and Setup
First things first - let's get that oven ready! Preheat your oven to 425°F (220°C). This temperature is absolutely perfect for achieving that gorgeous caramelization without overcooking our delicate shrimp.
While your oven heats up, position your oven rack in the center. This ensures even heat distribution around your baking dish. I also like to have my oven mitts ready and a clean kitchen towel nearby - you'll thank me later!
The key to restaurant-quality results is patience during preheating. Don't rush this step - a properly heated oven makes all the difference!
Proper Shrimp Arrangement in Baking Dish
Now for the fun part! Arrange your prepared shrimp in your chosen baking dish in a single layer. No overlapping allowed here, my friend! Each shrimp needs its own space to cook evenly and develop that beautiful golden color we're after.
- Place larger shrimp toward the center of the dish
- Arrange smaller ones around the edges
- Leave small gaps between each piece
- Curve them all in the same direction for elegant presentation
Next, dollop that incredible garlic herb butter mixture over each shrimp. Don't be shy with it - this is what creates all those amazing flavors we've been building up to!
Baking Time and Temperature Control
Pop that beautiful dish into your preheated oven for 8-10 minutes. I know it seems quick, but shrimp cook incredibly fast! Set your timer for 8 minutes first - you can always add more time if needed.
The butter should start bubbling happily around the edges within the first few minutes. That's exactly what we want to see! The garlic will begin releasing its heavenly aroma, and you'll know you're on the right track.
Visual Cues for Perfect Doneness
Here's where experience becomes your best friend! Your shrimp are perfectly cooked when they:
- Turn that gorgeous pink-orange color
- Curl slightly into a "C" shape
- Feel firm but not rubbery when gently pressed
- Have butter bubbling actively around them
If you want that extra golden perfection, give them a quick 1-2 minute broil at the end. But watch carefully - shrimp go from perfect to overcooked very quickly! I always stay right by the oven during this final step.
The moment they're done, remove them immediately. They'll continue cooking slightly from the residual heat, so timing is everything for this easy shrimp dinner!
Advanced Baking Techniques for Superior Results
Let me share the secrets that'll make your baked seafood taste like it's from a restaurant! These advanced techniques can turn good shrimp into amazing results. I've spent years mastering these methods, and they're game-changers for your garlic shrimp bake.
Home cooks often rush the process. But great baked seafood needs patience and detail. These techniques are worth every extra minute!
Preventing Overcooking and Rubbery Texture
Overcooked shrimp can ruin a beautiful garlic shrimp bake. I learned this the hard way. Now, I have a foolproof system. Start checking your shrimp at the 6-minute mark, for smaller sizes.
Look for these signs of perfect doneness:
- Shrimp turn opaque throughout with no translucent spots
- They form a beautiful C-curve shape
- Flesh feels firm but tender to touch
- Internal temperature reaches 120°F
If shrimp curl into tight O-shapes, they're overcooked! Remove them right away for delicious results. The key is watching closely during the final minutes.
Achieving Golden Brown Perfection
My secret for gorgeous golden browning is a two-level baking method. It works every time!
Start your baked seafood on the lower oven rack for the first 6 minutes. This lets the garlic herb butter infuse without browning too fast. Then move the dish to the upper rack for the final 2-4 minutes.
This method ensures:
- Even cooking throughout
- Perfect butter absorption
- Beautiful golden color development
- No burnt garlic or herbs
The result is shrimp that are tender inside with a gorgeous caramelized exterior. It's worth the extra step!
Broiling Techniques for Extra Color
Want that restaurant-style caramelized top on your garlic shrimp bake? The broiler is your best friend! But timing is everything - seconds count, not minutes.
Switch to broil for the last 1-2 minutes of cooking time. Stay right there and watch through the oven window! The difference between perfectly golden and burnt happens incredibly fast under the broiler.
Pro broiling tips:
- Move the rack to 4-6 inches from the broiler element
- Keep the oven door slightly ajar if possible
- Watch for golden bubbling around the edges
- Remove immediately when you see the color you want
This final broiling step creates that amazing caramelized finish. Your guests will think you ordered from their favorite restaurant!
Delicious Flavor Variations and Recipe Modifications
This baked shrimp recipe is incredibly versatile. It can be transformed into many amazing dishes with just a few ingredient swaps. These shrimp recipe variations will keep your dinner table exciting and give you options for every mood and occasion.
Each variation builds on our classic garlic herb foundation. It takes the flavors in completely different directions. You'll discover how easy it is to create restaurant-quality dishes that feel like entirely new recipes!
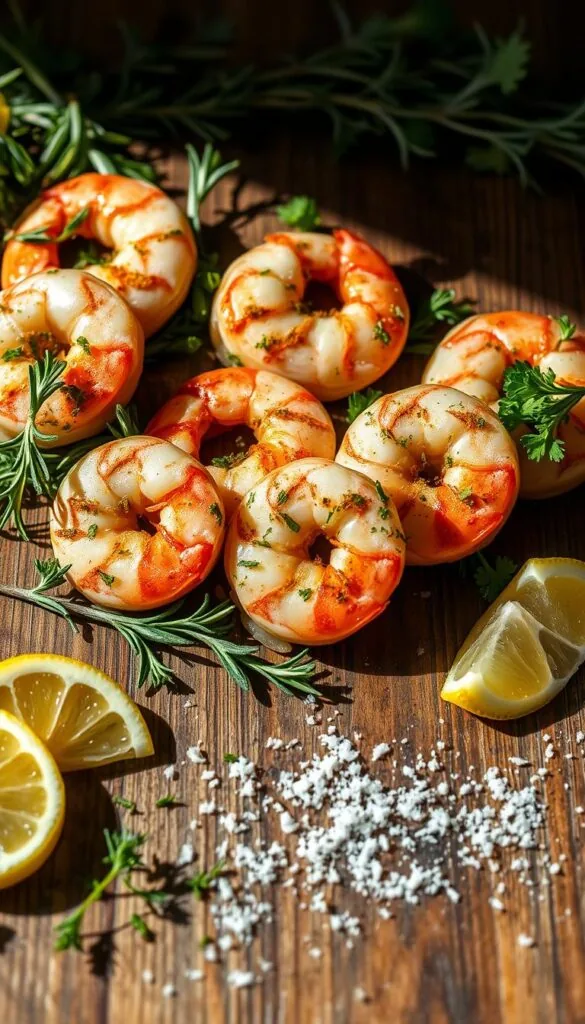
Mediterranean-Style Herb Combinations
My Mediterranean variation brings the sunny flavors of Greece right to your kitchen! Start with our basic garlic herb butter, then add crumbled feta cheese and chopped sun-dried tomatoes for incredible depth.
Sprinkle dried oregano alongside your fresh herbs - the combination creates this amazing herb crusted shrimp that tastes like a Greek vacation on a plate. The feta gets slightly golden and creamy during baking, creating a beautiful contrast with the tender shrimp.
Fresh basil and a pinch of dried thyme complete this Mediterranean masterpiece. The result is sophisticated yet approachable - perfect for impressing dinner guests!
Spicy Cajun and Creole Variations
Ready to add some heat to your evening? My Cajun twist transforms this dish into a spicy Southern sensation that'll make your taste buds dance!
Mix paprika, cayenne pepper, and a generous sprinkle of Old Bay seasoning right into your herb butter mixture. The paprika gives you that gorgeous red color while the cayenne delivers the perfect kick.
This spicy version pairs amazingly with the natural sweetness of shrimp. Start with less cayenne if you're heat-sensitive - you can always add more next time!
Lemon and White Wine Enhancements
For pure elegance, nothing beats my lemon white wine version! This sophisticated take creates the most incredible sauce that you'll want to soak up with crusty bread.
Add a splash of dry white wine directly to your baking dish before adding the shrimp. Then mix extra lemon zest into your herb butter for bright, citrusy notes that complement the wine beautifully.
The wine reduces during baking, creating this gorgeous, restaurant-quality sauce. It's perfect for special occasions or when you want to treat yourself to something extra special!
Don't be afraid to experiment with these variations - that's what cooking is all about! Mix and match elements from different versions to create your own signature dish that makes you and your loved ones happy.
Perfect Serving Ideas and Side Dish Pairings
Creating memorable shrimp dinner ideas starts with choosing the perfect sides and presentation! This versatile dish works beautifully as either an elegant appetizer or a satisfying main course. The rich garlic herb butter makes every bite absolutely irresistible.
I love how this seafood recipe adapts to any dining occasion. Whether you're hosting a casual family dinner or an upscale dinner party, the right pairings elevate this dish to restaurant-quality status!
Classic Accompaniments
The beauty of baked garlic shrimp lies in its incredible versatility. For appetizer service, I always recommend these crowd-pleasing options:
- Crusty French bread or garlic toast for soaking up that amazing herb butter
- Artisan crackers for a more refined presentation
- Toasted baguette slices brushed with olive oil
When serving as a main course, these sides create the perfect foundation for your shrimp dinner ideas:
- Creamy risotto that absorbs all those incredible flavors
- Buttery pasta like linguine or angel hair
- Fluffy white rice or wild rice pilaf
- Roasted vegetables such as asparagus, Brussels sprouts, or zucchini
- Simple green salad with lemon vinaigrette for freshness
Wine and Beverage Recommendations
The right beverage pairing transforms this seafood recipe into a complete dining experience! I'm particular about crisp white wines that complement the garlic and herbs perfectly.
White wine selections work beautifully with the rich butter sauce:
- Sauvignon Blanc - the acidity cuts through the richness beautifully
- Pinot Grigio - light and refreshing with citrus notes
- Chardonnay - choose unoaked varieties for best results
For red wine lovers, stick with lighter options like Pinot Noir or Beaujolais. These won't overpower the delicate shrimp flavors.
Non-alcoholic options include sparkling water with lemon, iced tea, or even a refreshing cucumber mint water!
Presentation and Garnishing Tips
Beautiful presentation makes every meal feel special! I love these simple yet elegant finishing touches:
- Fresh lemon wedges arranged around the dish
- Extra chopped parsley sprinkled on top for color
- Red pepper flakes for a pop of vibrant color
- Fresh herb sprigs like thyme or oregano
For casual dining, serve directly in the baking dish for that rustic, homey feel. The bubbling butter and golden shrimp look absolutely gorgeous!
For formal occasions, transfer to a beautiful white platter or individual serving plates. Drizzle any remaining herb butter over the top and add your garnishes with care.
Remember to provide small forks or cocktail picks for appetizer service, and don't forget plenty of napkins - this dish is wonderfully messy in the best possible way!
Proper Storage and Reheating Methods
Want to keep your leftover shrimp tasting fresh for days? This garlic herb masterpiece is so tasty, you might not have leftovers. But, I want you to enjoy every bite. Smart shrimp storage and gentle reheating will keep it tender and flavorful.
Act fast and store smart to keep those garlic herb flavors bright. Tomorrow, they'll shine just as brightly as the day you made them!
Refrigeration Best Practices
Time is key for leftover shrimp safety and quality. Get them in the fridge within two hours of cooking. Use an airtight container to keep moisture in and flavors locked in.
My favorite storage secret is to keep garlic herb butter with the shrimp. This keeps them moist and flavorful for up to three days.
Label your container with the date. This ensures you enjoy them at their best quality for up to three days.
Reheating Without Losing Quality
Reheating shrimp right is key. Use low and slow heat to avoid turning them into rubber. High heat can ruin the texture.
For perfect reheating, use the oven at 300°F for 5-7 minutes. Place the leftover shrimp in a dish, cover with foil, and warm until just heated through.
If using the microwave, use medium power in 30-second intervals. Check often to avoid overcooking.
Save some herb butter when you first make the dish. Add it when reheating for that fresh flavor. Your family will be amazed!
Cold leftover shrimp are great in salads, pasta, or grain bowls. Sometimes, the best reheating is no reheating at all!
Troubleshooting Common Baking Problems
Even the most seasoned home cooks face shrimp cooking problems. But, with these simple solutions, you can get perfect results every time! Knowing how to fix common issues boosts your confidence and ensures your baked garlic shrimp is delicious.
Common challenges include texture, flavor, and butter consistency issues. With the right cooking tips, you can easily solve these problems and make dishes that taste like they came from a restaurant.
Fixing Overcooked or Undercooked Shrimp
If your shrimp are overcooked and rubbery, don't worry! You can't change the texture, but you can make the dish work.
Chop the overcooked shrimp into smaller pieces. Use them in a pasta salad or shrimp salad. The texture won't be as noticeable in these dishes.
Remember, shrimp cook incredibly fast! They usually need only 4-6 minutes in a 425°F oven.
Undercooked shrimp are easier to fix. Just return them to the oven for 2-3 more minutes. They'll cook perfectly without becoming tough.
Addressing Watery or Bland Results
Watery results often come from not drying shrimp properly before baking. Always pat shrimp completely dry with paper towels before seasoning.
Frozen shrimp can release a lot of moisture during cooking. Try salting them lightly for 15 minutes before cooking to draw out extra water.
Bland results usually mean not enough seasoning or stale garlic. Fresh garlic makes a huge difference in flavor! Use recently minced garlic instead of pre-packaged varieties.
Don't forget to season the shrimp directly, not just the butter mixture. A light sprinkle of salt and pepper on the shrimp themselves enhances the overall taste.
Preventing Butter Separation
Butter separation during baking often happens when the oven temperature is too high or the butter was too warm. Stick to the 425°F temperature for best results.
Use room temperature butter instead of melted butter for your garlic herb mixture. Room temperature butter holds together better during baking.
If separation does occur, you can whisk the pan juices together after baking. This re-emulsifies the mixture, creating a smooth, cohesive sauce for serving.
Nutritional Benefits and Dietary Considerations
This baked shrimp dish is packed with health benefits. It's a healthy shrimp recipe that's both tasty and nutritious. Shrimp are tiny protein powerhouses, giving you about 20 grams of protein per serving.
This dish is also low in calories and carbs. You get all that protein without feeling heavy. Shrimp also have selenium, vitamin B12, and omega-3 fatty acids for your brain and heart.
The garlic and fresh herbs add more than flavor. They have anti-inflammatory and antioxidant properties. These help your body fight off harmful free radicals.
Health Benefits of Baked vs. Fried Shrimp
The baked vs fried choice is a big win for your health! Baking shrimp avoids excess oil and calories. Fried shrimp can have up to 200 extra calories from oil alone.
Baking keeps more nutrients in the shrimp. It doesn't damage omega-3 fatty acids like frying does. Baked shrimp is also easier to digest and feels lighter.
The baked vs fried difference is clear in how you feel. You won't feel greasy or heavy. Instead, you'll feel satisfied and energized!
Dietary Modifications and Substitutions
This healthy shrimp recipe fits many dietary needs! For low-sodium diets, reduce salt and let herbs and garlic flavor it. The natural flavors are strong and delicious.
It's perfect for keto or low-carb diets too! It's high in protein and low in carbs.
For those avoiding dairy, use olive oil or vegan butter instead of butter. The taste is a bit different but just as absolutely delicious! Olive oil adds heart-healthy benefits.
It's also gluten-free without any changes. This recipe is great for many eating styles and dietary needs!
Conclusion
You now have everything you need to make this amazing easy baked shrimp recipe at home! I'm really excited for you to enjoy the wonderful smells and happy faces at your dinner table.
This dish is simple yet beautiful. The garlic butter makes ordinary shrimp into something truly special. Your family and friends will be amazed, thinking you're a secret chef!
Remember, cooking should be fun and relaxing. Don't stress if it's not perfect the first time. Each time, you'll find new ways to improve it. Maybe you'll add extra herbs or try a different flavor.
The best thing about this recipe is how it brings people together. It's perfect for any occasion, creating special moments. Food has a unique way of connecting us all.
I'd love to hear about your cooking adventures with this dish. Every home cook has their own story, and yours is just starting. Get ready to impress yourself with how delicious homemade baked shrimp can be!