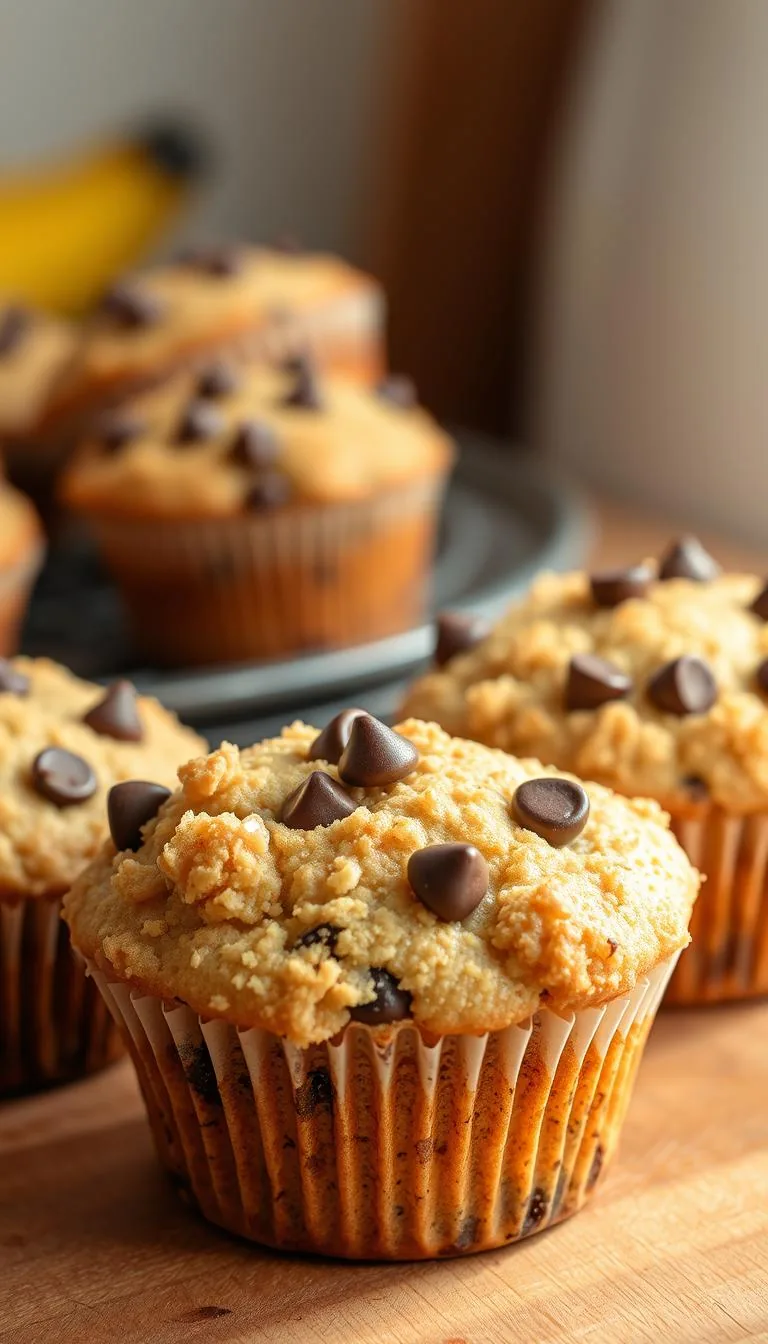
Welcome to my kitchen, friend! I'm thrilled to share a favorite treat with you. These homemade banana muffins will make your home smell amazing!
These muffins are not just any baked goods. They're moist, fluffy, and full of sweet banana and chocolate. I've perfected this easy muffin recipe over the years!
Looking for the perfect breakfast, snack, or gift? These treats are perfect. They're easy to make, even if you're new to baking!
Once you smell them baking, you'll see why they're a beloved staple in my home. They're ready in about 30 minutes!
Key Takeaways
- Ready in just 30 minutes from start to finish
- Perfect for beginners with simple, foolproof instructions
- Moist and fluffy texture with rich fruit and chocolate flavors
- Versatile for breakfast, snacks, or sharing with others
- Uses common pantry ingredients you likely have on hand
- Creates bakery-quality results in your home kitchen
Essential Ingredients for Perfect Banana Chocolate Chip Muffins
Creating perfect muffins starts with the right ingredients. When you pick the best muffin ingredients, you're on your way to making moist banana muffins everyone will love. Great baking begins with great ingredients, and this recipe is no exception.
Using ripe bananas and quality chocolate chips is key. They make every bite full of melty goodness. Each ingredient is important for that tender, fluffy texture we all enjoy.
Choosing the Right Bananas for Maximum Flavor
Many people make a mistake when choosing bananas. You want bananas that are a bit past their prime. Look for bananas with brown spots and soft, sweet flesh.
Riper bananas mean more natural sweetness and banana flavor. Don't worry if they look overripe. These bananas mash easily and add flavor to the batter, making the muffins moist.
If your bananas aren't ripe enough, speed up the process by placing them in a paper bag overnight. The ethylene gas will help them ripen faster!
Selecting Quality Chocolate Chips
Not all chocolate chips are the same. Choose semi-sweet or milk chocolate chips for the best flavor. They balance sweetness with banana flavor and add delicious chocolate bursts.
Choose chocolate chips that hold their shape well. Mini chocolate chips are great for even distribution and chocolate in every bite. Avoid chips with too much wax, as they won't melt well.
For a special touch, chop up a high-quality chocolate bar instead of using chips. The irregular pieces add different textures and intense chocolate pockets!
Flour and Leavening Agents Explained
All-purpose flour is essential for these muffins. It gives a tender crumb without being too heavy. The flour's protein content is perfect for structure and fluffiness.
Baking powder is like magic in powder form! It gives our muffin ingredients a lovely lift and creates domed tops. Make sure your baking powder is fresh - it should fizz when mixed with warm water. Old baking powder won't provide the rise you need.
A pinch of salt is very important. It enhances flavors and balances sweetness from bananas and chocolate chips. Don't skip it - your taste buds will thank you!
Kitchen Equipment and Tools You'll Need
Let's talk about the essential tools for a smooth chocolate chip baking adventure. You likely have most of these items in your kitchen. Amazing muffins don't need fancy gadgets, just the right basics.
Good preparation is key, one of my favorite baking tips. It sets you up for success every time. With everything ready, you can enjoy the fun of making delicious treats!
Essential Mixing Bowls and Utensils
You'll need two mixing bowls for this recipe. One large bowl for wet ingredients and one medium for dry. This makes mixing easier and keeps things organized.
A good whisk is your best friend for mixing ingredients smoothly. I also recommend a wooden spoon or rubber spatula for gentle folding. These tools prevent overmixing, which is key for tender muffins.
Remember a simple fork for mashing bananas. It's perfect for getting the right texture.
Muffin Pans and Liner Options
A standard 12-cup muffin tin is perfect for this recipe. You can grease the cups with butter or use paper liners. Both methods work great!
Paper liners make cleanup easy and give your muffins a bakery-fresh look. For greasing, use a light butter or cooking spray coating in each cup.
Metal pans bake more evenly than silicone, but both give delicious results.
Accurate Measuring Tools
Here's where precision is key! Measuring cups and spoons are essential because baking is a science. Accurate measurements make a big difference in your muffins.
Use dry measuring cups for flour and sugar, and liquid measuring cups for milk and oil. A set of measuring spoons handles smaller ingredients like vanilla and baking powder.
Keep a toothpick handy for testing doneness. It's the most reliable way to know when your muffins are perfectly baked!
Step 1: Preparing Your Ingredients
Getting started with your ingredients is key to making amazing banana bread muffins. It's the first step that can turn good muffins into absolutely incredible ones. Always remember, taking your time here can save you from disappointment later!
This step is all about setting yourself up for success. When your ingredients are ready, mixing your quick bread recipe will be a breeze. You'll see how smooth the process becomes!
Mashing Bananas to the Perfect Consistency
Ripe bananas are the heart of our recipe. I use a dinner fork to mash them in a bowl. Aim for mostly smooth with just a few small lumps remaining for the best flavor.
Don't aim for baby food smoothness. Those small lumps add amazing texture and sweetness. Mashing for 2-3 minutes gets you that perfect mix.
Here's what to look for in your mashed bananas:
- Mostly smooth texture with small lumps
- Natural sweetness that you can smell
- No large chunks bigger than a pea
- Slightly sticky consistency
Measuring Dry Ingredients Accurately
Precision matters here more than anywhere else! Use the spoon-and-level method for flour. Spoon it into the measuring cup and level it off with a knife. This avoids packing and ensures consistent results.
Measure all dry ingredients before mixing. This includes flour, baking powder, salt, and sugar. I set them out in separate bowls for a smoother process.
Pro tip: Test your baking powder's freshness by dropping a pinch into hot water. If it fizzes, it's good to go!
Bringing Ingredients to Room Temperature
Room temperature ingredients are essential for a smooth batter. Cold ingredients can lead to lumpy or uneven textures. Trust me on this one - it makes a huge difference!
Take your eggs and dairy out 30-45 minutes before baking. If you forgot, here's a quick trick:
- Place eggs in a bowl of warm water for 10 minutes
- Cut butter into small pieces to soften faster
- Microwave milk for 10-15 seconds to take the chill off
When everything is at room temperature, your quick bread recipe will blend beautifully. This creates the perfect muffin texture we all love!
Step 2: Creating the Wet Ingredient Mixture
Making a smooth, creamy wet mixture is key to making sweet treats at home just like a bakery! This step turns simple ingredients into the base for moist and tasty muffins. The wet mixture is the heart of what makes these breakfast muffins so tempting.
I love this part because you can smell and see the deliciousness coming together! Eggs, mashed bananas, oil, and vanilla create a scent that fills your kitchen with joy.
Combining Mashed Bananas with Eggs
Start by whisking eggs in a large bowl until they're smooth. This creates the perfect base for our mixture! Then, add the mashed bananas we prepared earlier.
The eggs and bananas mix together beautifully. Whisk until they're well combined and creamy. Make sure there are no big banana chunks left.
Even small banana pieces add great texture to your muffins. The goal is to avoid big chunks that could affect baking.
Adding Oil and Vanilla Extract
Now, it's time to add the oil and vanilla extract! I use vegetable oil or melted butter for the best flavor. Both options make the muffins tender.
Pour in the oil slowly while whisking. This ensures everything blends smoothly. Then, add a splash of vanilla extract for extra flavor.
Vanilla might seem small, but it boosts all other flavors. It's what turns good muffins into amazing ones!
Achieving a Smooth Wet Mixture
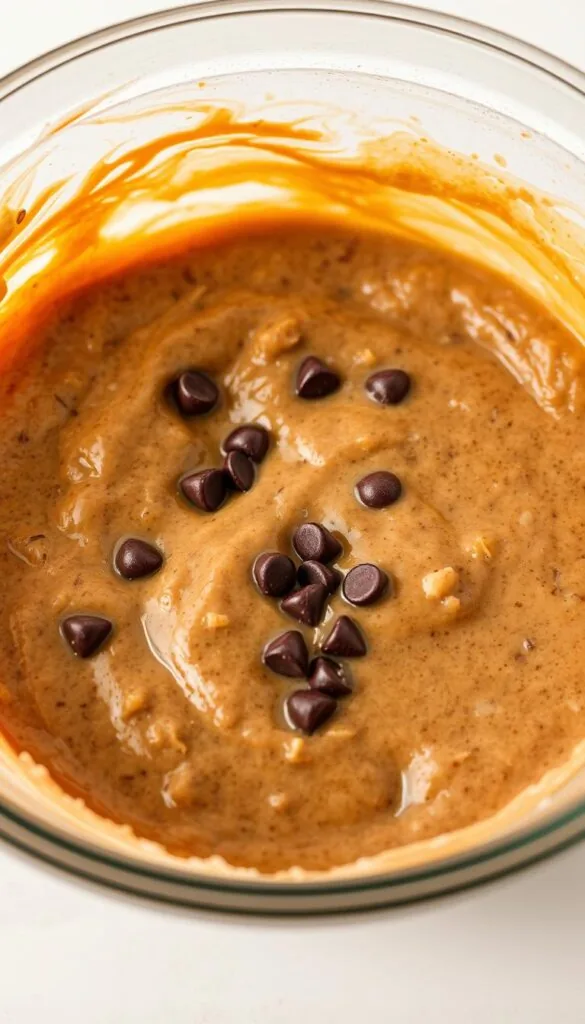
Whisk everything until it's well combined and smooth. The mixture should look creamy and smell amazing! If you want to taste it, go for it.
Your wet mixture should be golden from the bananas and eggs. It should pour smoothly without lumps. This smoothness is what makes our breakfast muffins so tender and moist.
| Ingredient | Amount | Purpose | Mixing Order |
|---|---|---|---|
| Eggs | 2 large | Binding and structure | First |
| Mashed bananas | 1 cup | Moisture and flavor | Second |
| Oil or melted butter | 1/3 cup | Tenderness and richness | Third |
| Vanilla extract | 1 teaspoon | Flavor enhancement | Fourth |
Take a moment to admire your mixture. You're on your way to making delicious sweet treats that everyone will love.
Step 3: Mixing the Dry Ingredients
Getting your dry ingredients just right is key to making bakery-style muffins. This step might seem simple, but it's very important. It sets the stage for your muffins' texture and taste.
This is where the magic begins. You're not just mixing ingredients. You're building a base that will hold all the banana and chocolate chip goodness!
Sifting Flour and Baking Powder
Begin by using a medium bowl for your flour and baking powder. One of my top tips is to whisk these two together first. This spreads the baking powder evenly through the flour.
Whisk them well for about 30 seconds. This helps avoid any lumps. Lumps can cause uneven rising, and nobody likes a lopsided muffin!
Adding Salt and Sugar
Now, it's time to add sugar and a pinch of salt. Don't skip the salt, even though it's small. That little bit of salt enhances all the other flavors and gives your muffins that bakery taste.
Put in your granulated sugar and a half teaspoon of salt. The sugar sweetens and makes the muffins tender and moist.
Creating an Even Dry Mixture
Now, your patience is rewarded! Whisk all the dry ingredients until they're light, fluffy, and well mixed. I whisk for about a minute to ensure everything is evenly distributed.
You'll know you've done it right when the mixture looks uniform and smells great. This is a key tip for making great muffins. Taking the time to mix the dry ingredients evenly ensures every bite is perfect!
Your dry mixture should be smooth and well-blended. This foundation is what will help you make those perfectly risen, tender bakery-style muffins that everyone will love!
Step 4: Combining Wet and Dry Ingredients
Now it's time to mix your wet and dry ingredients together. This step is key to making your easy banana muffins light and fluffy. Be gentle when you mix them together.
Pour the wet banana mixture into the bowl with the dry ingredients. You'll see a beautiful mix of creamy wet and dry ingredients. This is where the magic starts!
The Proper Folding Technique
Get your rubber spatula or wooden spoon ready. We're going to fold, not stir hard! Move slowly and gently to mix the wet and dry ingredients.
Start at the bottom of the bowl and fold up, turning it slightly with each fold. You'll see flour streaks at first. These homemade muffin tips will help you get great results every time.
Avoiding Overmixing
The key is to stop mixing when everything just comes together. Your batter should look a bit lumpy with flour streaks. This might seem wrong, but it's what we want!
Overmixing makes the muffins tough and dense. Don't keep stirring once everything is just combined. A few lumps are okay!
Incorporating Chocolate Chips
Now it's time for the best part - adding chocolate chips! Sprinkle them over the batter and fold them in with three to four gentle strokes. Don't worry about getting them evenly distributed yet.
Save some chocolate chips to sprinkle on top of each muffin before baking. This makes the muffins look like they came from a bakery and adds extra chocolate in every bite!
Distribution Tips for Even Chocolate Chips
For evenly distributed chocolate chips in your easy banana muffins, try these tips:
- Toss chips in flour before adding - this prevents them from sinking to the bottom
- Add chips gradually while folding to ensure even distribution
- Use different chip sizes - mix mini chips with regular ones for varied texture
- Reserve some for tops - press a few chips into each muffin's surface before baking
Remember, gentle handling is key to tender muffins. Your batter is ready when chocolate chips are barely mixed in and the mixture looks a bit rough. Perfect!
Step 5: Filling and Preparing Muffin Pans
Preparing the muffin pans is my favorite part of making banana chocolate muffins. It's a step that can make all the difference. The right preparation ensures your muffins pop out perfectly. Let me show you the best baking techniques to make you feel like a pro baker.
You're almost ready to put those muffins in the oven. The wait is exciting! But taking a few extra minutes here will make your banana chocolate muffins look as good as they taste.
Greasing Pans vs. Using Paper Liners
Now, you get to choose how to prepare your muffin pan. Both options work great for banana chocolate muffins.
Paper liners are my go-to - they make your muffins look like they came from a bakery! They're also super easy to use. Your muffins will come out clean every time. Use liners that fit your muffin cups well.
If you prefer greasing, use butter or cooking spray. Don't forget the corners and edges - muffins love to stick there! A pastry brush with melted butter works best for covering everything.
- Paper liners: Easy removal and professional appearance
- Greased pans: More rustic look with crispy edges
- Combination method: Light greasing plus liners for extra insurance
Proper Batter Distribution Techniques
Even distribution is key for uniform banana chocolate muffins. This is where many home bakers struggle, but I've got a foolproof method!
Use a large spoon or ice cream scoop for consistent results. I love using a medium ice cream scoop - it makes portioning easy and fast! Scoop gently to avoid deflating the batter.
Fill each cup before adjusting any uneven portions. This baking technique ensures every muffin bakes evenly.
Optimal Fill Level Guidelines
The golden rule is to fill each cup about two-thirds full. This allows your muffins to rise beautifully without overflowing.
Filling too little makes muffins flat. Too much causes a messy overflow. The two-thirds rule works every time!
After filling, sprinkle extra chocolate chips on top. This little crown of chocolate makes them irresistible! Press the chips down slightly so they stay in place during baking.
Your muffin pan should yield 12 standard-sized muffins when filled right. If you have leftover batter, you're probably overfilling. Adjust for the best results with your banana chocolate muffins!
Step 6: Baking Your Banana Chocolate Chip Muffins
Now it's time to bake your banana chocolate chip muffins. This is the most exciting part of the journey. You'll soon smell the amazing aroma in your kitchen!
Getting the baking right is key for perfect banana muffins. Every detail, from temperature to timing, matters. Here are my top oven baking tips for success every time!
Setting the Correct Oven Temperature
The secret to great muffins is the right oven temperature. Set your oven to 375°F (190°C). This temperature gives you a golden-brown top and a moist inside.
Don't skip this step. Let your oven heat up for 15-20 minutes. An oven thermometer is your best friend. It helps ensure your oven is at the right temperature.
Too high a temperature can burn the tops before the centers are cooked. Too low, and your muffins will be dense and flat.
Positioning Racks for Even Baking
Where you place your oven racks is important. Put your rack in the center position. This ensures even air circulation around your muffin pan.
The center position helps heat distribute evenly. It prevents the bottoms from getting too dark while keeping the tops pale. It's a simple oven baking tip that makes a big difference!
If you're baking multiple pans, leave at least 2 inches between them. This lets hot air flow freely for consistent results.
Timing and Testing for Doneness
Be patient! Set your timer for 18-20 minutes, but start checking at 18 minutes. Every oven is different, so trust your senses.
The wait is almost unbearable! The sweet bananas and melted chocolate will have everyone waiting in your kitchen.
"The best bakers know that perfect timing comes from observation, not just following the clock. Your muffins will tell you when they're ready!"
Toothpick Test Method
The toothpick test is foolproof for checking doneness. Insert a clean toothpick into the center of a muffin. It should come out with a few moist crumbs.
If the toothpick comes out clean, your muffins might be overbaked. If it's covered in wet batter, give them 2-3 more minutes and test again.
Those moist crumbs are perfect! They mean your perfect banana muffins are tender and moist inside while fully cooked.
Visual Cues for Perfect Muffins
Your eyes are just as important as the toothpick test! Look for these signs of perfectly baked muffins:
- Golden-brown tops that spring back when lightly touched
- Muffins that have pulled slightly away from the pan edges
- A beautiful dome shape that's risen nicely above the pan
- No wet or shiny spots on the surface
The tops should feel firm but not hard when gently pressed. The golden color means the sugars have caramelized beautifully, giving that bakery-style look.
| Baking Stage | Time | Visual Cues | Action Needed |
|---|---|---|---|
| Initial Baking | 0-10 minutes | Batter rising, no browning | Do not open oven door |
| Mid-Baking | 10-15 minutes | Light golden color appearing | Continue baking undisturbed |
| Final Stage | 15-20 minutes | Golden brown, springs back | Test with toothpick |
| Perfectly Done | 18-22 minutes | Rich golden, firm tops | Remove from oven immediately |
Once your muffins pass all these tests, take them out of the oven right away. Let them cool in the pan for about 5 minutes before transferring to a wire rack. This brief cooling prevents them from falling apart while they're warm and tender!
Advanced Tips and Recipe Variations
Make your muffin recipe special with these creative ideas and healthier options! I love trying new ingredients to make healthy banana muffins that everyone will enjoy.
This recipe is super flexible. You can change it to fit your taste or dietary needs easily!
Healthier Ingredient Substitutions
Make your banana muffins healthier without losing flavor. These easy swaps boost nutrition while keeping taste great.
Using Whole Wheat Flour
Use up to half whole wheat flour for more fiber and nutrients. It adds a nutty flavor that goes well with bananas.
Begin with 25% whole wheat if you're new. Your family won't notice, but they'll get more nutrients.
Reducing Sugar Content
Reduce sugar by up to one-third. Use extra mashed banana as a sweetener. You can also use unsweetened applesauce for healthy banana muffins that taste amazing!
Honey or maple syrup are great too. Just reduce other liquids a bit when using them.
Creative Mix-in Options
Now it's time to get creative! These additions will make your muffins exciting and never boring.
Adding Nuts and Seeds
Chopped walnuts or pecans add crunch and richness. Toast them lightly for more flavor.
Sunflower seeds, pumpkin seeds, or chia seeds add fun texture. Mix different seeds for a unique twist that adds healthy fats and protein.
Different Chocolate Varieties
Dark chocolate chips give a sophisticated taste. White chocolate chips add extra sweetness that kids love!
Mini chocolate chips spread out better in the batter. Try chocolate chunks for bigger chocolate bursts.
Gluten-Free and Vegan Adaptations
Everyone should enjoy banana muffins! These changes make sure no one is left out.
For gluten-free, use a high-quality blend in a 1:1 ratio. The results are delicious and you won't miss the gluten!
Vegan versions are easy. Replace eggs with flax eggs (1 tablespoon ground flaxseed + 3 tablespoons water per egg). Use plant-based milk and coconut oil instead of butter.
| Variation Type | Key Substitutions | Flavor Profile | Nutritional Benefits |
|---|---|---|---|
| Whole Wheat | 50% whole wheat flour | Nutty, hearty | Higher fiber, B vitamins |
| Reduced Sugar | Extra banana, applesauce | Naturally sweet | Lower calories, more potassium |
| Gluten-Free | GF flour blend 1:1 | Light, tender | Suitable for celiac diet |
| Vegan | Flax eggs, plant milk | Rich, moist | No animal products, omega-3 |
These changes show that healthy banana muffins can be just as tasty as regular ones. Feel free to mix different swaps to find your own special recipe!
Storage, Serving, and Troubleshooting
After baking, keeping your banana chocolate chip muffins fresh is key. Storing banana muffins right is essential. I'll share my top storage and serving tips to keep them delicious.
We'll also tackle common baking problems. Don't worry if your first batch isn't perfect. Muffin troubleshooting is part of the learning journey, and I've got solutions for every issue.
Proper Storage Methods
The secret to fresh muffins is the right storage method. Whether you'll eat them tomorrow or next month, I've got you covered with these methods!
Short-Term Storage Solutions
For storing banana muffins you'll eat in three days, room temperature storage is perfect. Place cooled muffins in an airtight container. This keeps them moist and tender.
Make sure muffins are cool before storing. Warm muffins can make them soggy. Nobody likes soggy muffins!
These muffins freeze well for up to three months! Wrap each muffin in plastic wrap, then in freezer bags. This prevents freezer burn and keeps flavor.
Label your bags with the date. You'll thank yourself later! Thaw at room temperature for about an hour when you're ready to enjoy.
Serving Suggestions and Reheating Tips
Your muffins are perfect on their own, but I love adding a twist. Warm muffins are extra special. Here are my favorite ways to warm them up.
For frozen muffins, microwave for 20-30 seconds. For room temperature ones, 10-15 seconds is enough. You can also warm them in a 300°F oven for 5-7 minutes.
Try them with butter, honey, or Greek yogurt. These simple touches make them gourmet!
Common Problems and Solutions
Every baker faces challenges, and that's okay! Muffin troubleshooting gets easier once you know what went wrong and how to fix it. Let's solve these common issues together.
Fixing Dense or Dry Muffins
Dense or dry muffins often come from overmixing or overbaking. The batter should be slightly lumpy. Overmixing makes muffins tough.
If muffins are dry, check your baking time. Start testing for doneness 2-3 minutes before the recipe suggests. A toothpick should have a few moist crumbs.
Preventing Uneven Baking
Uneven baking is a common problem. But the solution is simple! Place your oven rack in the center. This ensures even heat around your muffin pan.
Consider rotating your pan halfway through baking if your oven has hot spots. Most ovens do, and this step ensures even results every time!
| Storage Method | Duration | Best For | Key Tips |
|---|---|---|---|
| Room Temperature | 3 days | Quick consumption | Airtight container, completely cooled |
| Refrigerator | 1 week | Extended freshness | Wrapped individually, bring to room temp before serving |
| Freezer | 3 months | Long-term storage | Double wrap, label with date |
| Individual wrapping | Varies | Portion control | Perfect for grab-and-go snacks |
The best part about baking is learning something new with each batch. Don't be discouraged by imperfect results. They're stepping stones to becoming an amazing baker!
Baking is all about learning and improving with each try! These storing banana muffins techniques and troubleshooting tips will help you create delicious results. Your family and friends will be amazed by your perfectly fresh, beautifully baked muffins every time!
Conclusion
You now have everything you need to make amazing homemade banana chocolate chip muffins! These simple steps will help you bake successfully every time.
I love how this recipe brings families together. The sweet aroma fills your kitchen, drawing everyone to gather. Your kids will want to help measure ingredients. Your neighbors will wonder what smells so good!
These muffins are perfect for busy mornings, afternoon snacks, or weekend treats. You can pack them in lunch boxes or serve them warm with butter. Each bite is a perfect mix of banana sweetness and chocolate richness.
Don't worry if your first batch isn't perfect. Baking gets easier with practice. I've made hundreds of these muffins, and each time I discover something new. Maybe you'll add walnuts next time or try mini chocolate chips.
Your homemade banana chocolate chip muffins will taste much better than store-bought ones. You control every ingredient and can adjust sweetness to your family's taste.
Start mixing that batter today! Your kitchen deserves the wonderful smells, and your family deserves these delicious treats. Happy baking to you!