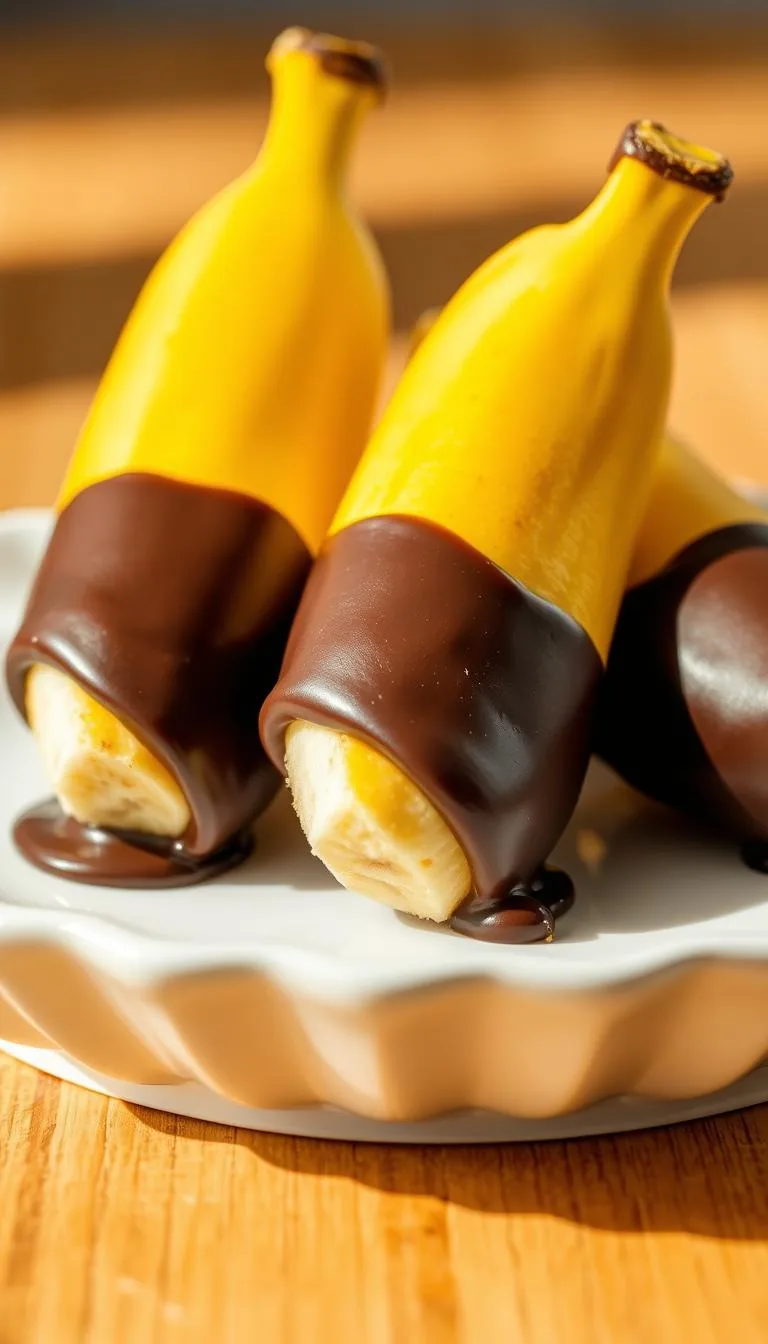
Welcome to the sweetest and simplest treat you'll ever make! I'm excited to share this homemade chocolate bananas recipe with you. These treats are perfect for satisfying your sweet tooth or impressing party guests.
The best part about these easy chocolate treats is how quick they are to prepare. You only need a few simple ingredients and about 15 minutes of your time. Whether you're planning a birthday party or looking for a healthier dessert alternative, this treat will become your go-to solution.
I love how versatile this chocolate dipped bananas recipe can be! You can customize them with endless toppings and flavors to suit any occasion. From sprinkles to nuts, the possibilities are truly endless for creating your perfect sweet treat.
Key Takeaways
- Quick and simple recipe requiring only 15 minutes of preparation time
- Perfect for parties, family activities, or personal indulgence
- Healthier dessert alternative compared to traditional sweets
- Highly customizable with various toppings and flavor combinations
- Requires minimal ingredients that are easily found in most kitchens
- Great activity to enjoy with kids and family members
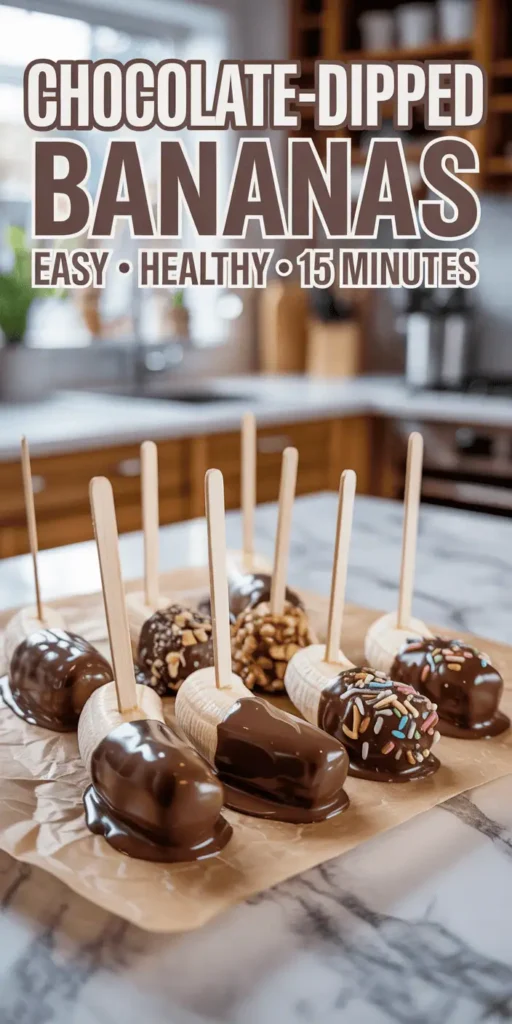
What You Need to Make Perfect Chocolate Covered Bananas
Before we start making these tasty treats, let's get everything ready! Having all your banana dessert ingredients and tools ready makes the process smoother. It's frustrating to find out you're missing something important in the middle.
This recipe is simple because the list of supplies is short. You probably have most of these items in your kitchen already!
Essential Ingredients
Your banana dessert ingredients list is short and sweet. You'll need ripe bananas as your main ingredient. I'll share how to pick the perfect ones soon!
For the chocolate coating, use high-quality chocolate chips or chopped chocolate bars. You can choose dark, milk, or white chocolate. I always have semi-sweet chocolate chips ready for treats.
Don't forget a tablespoon of coconut oil. It makes your chocolate coating smooth. It's the secret that makes all the difference!
Required Equipment and Tools
Your chocolate coating supplies are probably in your kitchen drawers. You'll need wooden popsicle sticks or bamboo skewers for handles.
A microwave-safe bowl is great for melting chocolate. I prefer glass bowls because they heat evenly and are easy to clean.
Parchment paper is essential for this project! Line your baking sheets with it so your treats won't stick.
| Essential Items | Purpose | Kitchen Alternative |
|---|---|---|
| Wooden popsicle sticks | Creating handles | Bamboo skewers |
| Microwave-safe bowl | Melting chocolate | Double boiler setup |
| Parchment paper | Non-stick surface | Silicone baking mat |
| Baking sheet | Holding finished treats | Large plate |
Choosing the Right Bananas
Choosing the right bananas is key for success! Look for bananas that are bright yellow with a few small brown spots. They should feel firm when you gently squeeze them.
Avoid bananas that are too green - they'll taste bland. Skip bananas with lots of brown spots because they're too soft.
The perfect banana should be sweet but firm. I always buy my bananas a day or two before I plan to make these treats!
The key to perfect chocolate covered bananas lies in choosing bananas that are sweet but firm enough to hold their shape when dipped.
Mastering the art of ripe bananas selection gets you halfway to chocolate-covered banana perfection!
Preparing Your Workspace and Ingredients
Getting your workspace ready is key to making chocolate-dipped bananas like a pro! A few minutes of prep work can turn this task into a fun experience. You'll feel like a real pastry chef when everything goes smoothly!
I always say that preparation is half the battle when working with chocolate. Once the chocolate melts, you want everything ready. Scrambling for parchment paper while your chocolate hardens is a nightmare!
Setting Up Your Dipping Station
Creating the perfect dipping station is essential for your chocolate-banana adventure! Clear a good amount of counter space near your stove or microwave. You need room to work comfortably without feeling cramped.
Line two large baking sheets with parchment paper. One for your bananas and another for the finished treats. Place a cooling rack on one sheet for extra drainage. Keep a small bowl of warm water nearby for cleaning your hands between steps.
Gather all your toppings in small bowls and arrange them in a line. This assembly-line approach keeps everything organized and prevents any last-minute rushing around!
Preparing the Bananas
Choose bananas that are just barely ripe – yellow with minimal brown spots. Overripe bananas get too soft and won't hold up well to dipping.
Cut each banana in half crosswise to create perfect portion sizes. Gently insert wooden popsicle sticks or skewers about halfway through each piece – don't push too hard or you'll split the banana!
Now comes my secret weapon: place the banana pieces on a parchment-lined tray and pop them in the freezer for 15-20 minutes. This brief freezing firms them up just enough to prevent mushiness during dipping. They won't freeze solid – just get perfectly chilled!
Melting Chocolate Safely
Mastering the right chocolate melting technique is key for smooth, glossy results! I've learned this the hard way after ruining more than a few batches in my early days. Patience is absolutely key here – rushing leads to seized, grainy chocolate that's impossible to work with.
For the microwave method, chop your chocolate into small, uniform pieces. Use 30-second intervals at 50% power, stirring between each burst. The chocolate will look solid even when it's almost ready – that's normal!
If you prefer the double boiler approach, make sure the water barely simmers and never touches the bottom of your bowl. Steam and water are chocolate's worst enemies, so keep everything completely dry.
| Preparation Step | Time Required | Key Success Factor | Common Mistake to Avoid |
|---|---|---|---|
| Workspace Setup | 5-10 minutes | Everything within reach | Forgetting parchment paper |
| Banana Prep | 10 minutes | Proper ripeness level | Using overripe bananas |
| Pre-chilling | 15-20 minutes | Firm but not frozen | Freezing too long |
| Chocolate Melting | 3-5 minutes | Low heat, constant stirring | Overheating chocolate |
Remember, good preparation makes the actual dipping process so much more enjoyable! When everything's ready to go, you can focus on creating beautiful, delicious treats instead of scrambling around your kitchen. Your future self will thank you for this extra effort!
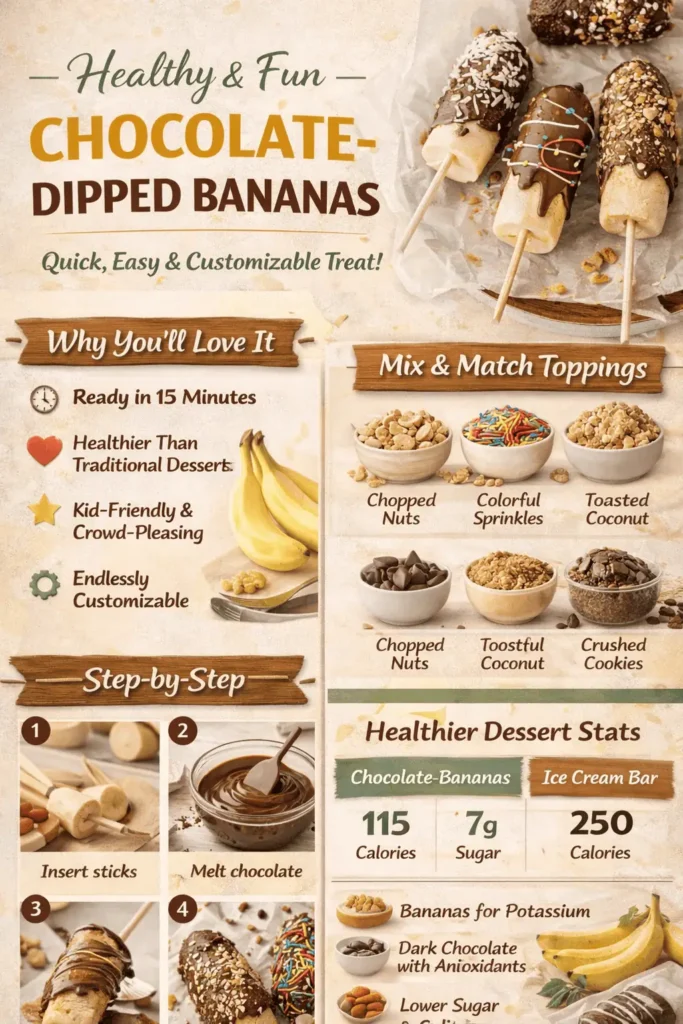
Step-by-Step Guide to Making Chocolate Covered Bananas
Ready to make chocolate-covered bananas? Let's dive into the chocolate dipping process! I'm excited to guide you through each step. This is where the magic happens.
The beauty of these banana coating steps is their simplicity. You don't need fancy tools or years of experience. Just follow along, and you'll get stunning results every time!
Insert Sticks or Skewers
Begin by gently pushing popsicle sticks into each banana half. Insert them about halfway through for stability. This makes it easier to hold during dipping.
Hold the banana firmly but gently while inserting the stick. If it's too soft, freeze it for 5 more minutes. Trust me – this step prevents mishaps later!
Dip in Melted Chocolate
Now, the chocolate dipping process gets exciting! Hold the stick at an angle and slowly lower the banana into melted chocolate. Rotate it gently for even coverage.
Let excess chocolate drip off for 3-5 seconds. This prevents a thick, uneven coating. Don't rush this step – patience is key!
The secret to perfect chocolate coverage is in the rotation technique – slow and steady wins every time.
Add Toppings (Optional)
If using toppings, work quickly while the chocolate is wet! Roll your dipped banana in chopped nuts, sprinkles, or coconut flakes right after dipping.
I love this part because it's where you can get creative. Try different combinations – crushed cookies, mini chocolate chips, or even a light dusting of sea salt!
Set and Cool
Place your chocolate-covered creations on a parchment-lined baking sheet. Make sure they're not touching each other. The chocolate setting time is key for a perfect finish.
Pop them in the refrigerator for 15-20 minutes. For faster results, try the freezer for 8-10 minutes instead.
| Cooling Method | Time Required | Best For | Texture Result |
|---|---|---|---|
| Refrigerator | 15-20 minutes | Standard setting | Firm, smooth |
| Freezer | 8-10 minutes | Quick results | Extra firm |
| Room Temperature | 30-45 minutes | Hot weather | Softer coating |
| Counter + Fan | 20-25 minutes | Even setting | Professional finish |
The anticipation during the chocolate setting time is almost as sweet as the final result! I always make extra because they disappear quickly once they're ready.
These banana coating steps might seem simple, but they create something special. Each bite is a satisfying crack of chocolate followed by creamy, sweet banana – pure bliss!
Chocolate Types and Melting Techniques
The type of chocolate you choose makes a big difference. Understanding different melted chocolate types and mastering proper chocolate melting methods is key to perfect results. I've tried every variety and technique, and I'm excited to share what works best!
Each chocolate has its own flavors and textures. The melting method affects how smooth and glossy your final coating looks. Let me guide you through everything you need to know!
Dark Chocolate vs. Milk Chocolate vs. White Chocolate
Dark chocolate offers rich, sophisticated flavors that pair well with nuts and sea salt. It has less sugar and more cocoa, making it great for adults who like less sweetness. Dark chocolate also hardens quickly, giving a satisfying snap when you bite into it.
Milk chocolate is creamy and sweet, loved by kids. It's my go-to choice for family gatherings because everyone loves its familiar taste. The extra milk content makes it slightly softer when set, creating a tender coating.
White chocolate is elegant and perfect for special occasions. While not true chocolate, it has a sweet, vanilla-like flavor that complements fruit beautifully. White chocolate shows off colorful toppings wonderfully and creates stunning visual contrast.
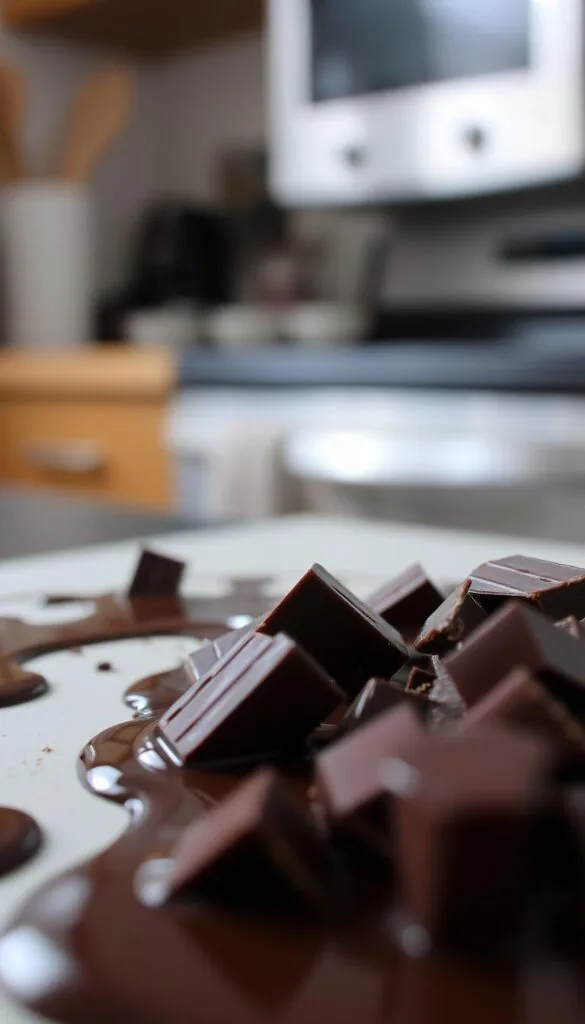
Double Boiler Method
The double boiler method gives you control over temperature and prevents burning. This technique works perfectly for larger batches and ensures consistent results every time.
Fill a saucepan with about two inches of water and bring it to a gentle simmer. Place your chocolate in a heat-proof bowl that fits snugly over the pan. The bottom shouldn't touch the water!
Stir constantly as the steam gently melts your chocolate. This method takes patience but delivers incredibly smooth results. Remove from heat once the chocolate flows like warm honey.
Microwave Melting Technique
My weekday go-to method! Microwave melting saves time and works perfectly for small batches. Use 30-second intervals at 50% power, stirring between each round.
Start with chopped chocolate in a microwave-safe bowl. After each interval, stir thoroughly even if the chocolate doesn't look melted yet. The residual heat continues working between intervals.
Most chocolate types need 2-3 intervals total. Never rush this process with full power – you'll end up with seized, grainy chocolate that's impossible to fix!
Adding Coconut Oil for Smooth Coating
Here's my secret weapon for achieving that professional smooth chocolate coating! Add one teaspoon of coconut oil per cup of melted chocolate for luxuriously glossy results.
The coconut oil thins the chocolate just enough for easy dipping while maintaining proper hardening. It creates that perfect shell that cracks beautifully when you bite into it!
Stir the coconut oil in completely after your chocolate melts. You'll notice the mixture becomes more fluid and easier to work with immediately.
| Chocolate Type | Best Melting Method | Flavor Profile | Setting Time |
|---|---|---|---|
| Dark Chocolate | Double Boiler | Rich, slightly bitter | 5-8 minutes |
| Milk Chocolate | Microwave (30-sec intervals) | Sweet, creamy | 8-10 minutes |
| White Chocolate | Double Boiler (low heat) | Sweet, vanilla notes | 10-12 minutes |
| Semi-Sweet | Either method | Balanced sweet-bitter | 6-9 minutes |
Remember these chocolate melting methods work for any recipe! Once you master these techniques, you'll have perfectly smooth coatings for all your favorite treats. The key is patience and gentle heat – your bananas will thank you for it!
Creative Toppings and Flavor Variations
The magic of chocolate-dipped bananas shines when you try chocolate banana toppings and flavors. It's your chance to be creative and make stunning creative dessert decorations. People will want to know your secret.
I love this part because it's all about creativity and deliciousness. Whether for a party or a treat, the right toppings make chocolate bananas special.
Nuts and Seeds
Chopped nuts add crunch and flavor. Almonds, pecans, and pistachios are great with dark or milk chocolate.
Here's what works best:
- Finely chopped almonds for a classic touch
- Crushed pecans for rich, buttery flavor
- Pistachios for a pop of color and unique taste
- Toasted sesame seeds for an unexpected twist
Pro tip: Toast your nuts lightly before chopping to enhance flavor!
Coconut Flakes and Sprinkles
Coconut flakes bring a tropical vibe. They add texture and taste like the beach. Shredded coconut is great with white or dark chocolate.
Colorful sprinkles add a festive touch. Rainbow sprinkles are fun for kids, while pearl dust adds elegance to adult events.
My favorites are coconut with white chocolate and rainbow sprinkles with milk chocolate. The flavor variations are endless!
Crushed Cookies and Candy
Crushed Oreos create a cookies-and-cream dream. Graham crackers give a s'mores vibe. Mini marshmallows add fun texture and sweetness.
Other favorites include:
- Crushed peppermint candies for a refreshing kick
- Toffee bits for buttery crunch
- Crushed pretzels for sweet-and-salty perfection
Drizzle Patterns and Decorative Techniques
My favorite is the contrasting chocolate drizzle! Melt white chocolate for dark-coated bananas, or dark over white. Use a fork for zigzags, dots, or swirls.
Work quickly with both chocolates at the right temperature. This makes beautiful patterns.
Don't be afraid to mix toppings. Some of my best flavors came from trying new things!
Troubleshooting Common Problems
Don't worry if your chocolate-dipped bananas don't look perfect at first. I've got solutions for every problem! Even experienced cooks face chocolate coating problems sometimes. Most issues have simple fixes to get you back on track quickly.
Every chocolate problem is a chance to learn. I've made every mistake, and now I'm here to help you avoid them! Let's look at the most common problems and their easy fixes.
Chocolate Too Thick or Thin
Thick chocolate that won't coat smoothly is frustrating. If your chocolate is too thick, never add water. This will make it seize up completely!
To fix thick chocolate, add a little coconut oil or vegetable shortening. Start with half a teaspoon and stir gently. This should make the chocolate smooth and glossy again.
If your chocolate is too thin, let it cool for a minute or two. Stir it occasionally and test the consistency by dipping a spoon. It should coat the spoon evenly without dripping off right away.
Bananas Sliding Off Sticks
It's disappointing when banana stick issues leave you with naked fruit! This usually happens if the stick isn't inserted far enough into the banana.
Make sure to push your wooden stick or skewer at least two-thirds of the way through the banana. For extra security, chill your bananas in the refrigerator for 15 minutes before inserting sticks.
Choose bananas that are ripe but firm. Overripe bananas are too soft and won't hold the stick properly. The perfect banana should give slightly when pressed but not feel mushy.
Chocolate Not Setting Properly
When chocolate stays sticky or soft after cooling, temperature is usually the problem. Check that your refrigerator is set between 35-38°F for optimal setting conditions.
Be patient – chocolate can take 15-30 minutes to set completely depending on thickness. If you're in a hurry, try placing them in the freezer for 5-10 minutes instead.
Humidity can also affect setting time. On humid days, your chocolate may need extra time to firm up properly.
Preventing Chocolate from Cracking
Cracked chocolate coating happens when there's a sudden temperature change. Temperature shock causes the chocolate to contract and split.
Always let your chocolate-covered bananas come to room temperature gradually before serving. Take them out of the refrigerator 5-10 minutes early.
When storing, wrap each banana individually in parchment paper to prevent moisture buildup. This simple step prevents both cracking and condensation issues that can ruin your beautiful coating!
Storage and Shelf Life Tips
Having a stash of chocolate covered bananas ready is the best! Proper dessert storage is key to keeping them tasty. They stay fresh and delicious when stored right.
You can make a lot at once and enjoy them for weeks. I'll share my top storage tips to keep them fresh and looking great.
Proper Storage Methods
For perfect chocolate, use the right storage method. Let your bananas set for 30 minutes at room temperature first.
For short-term, use an airtight container with parchment paper between layers. This keeps chocolate from sticking. Make sure your container seals well to keep freshness in.
Don't store them in direct sunlight or near heat. The chocolate will melt and get sticky. I learned this the hard way!
Freezing vs. Refrigerating
Frozen bananas storage is great for longer storage! For up to three days, the fridge works well. Just put them in an airtight container.
But for longer, freezing is best. They taste like healthy ice cream pops when frozen. The texture becomes creamy and refreshing.
Wrap each banana in plastic wrap first, then in a freezer bag. This prevents freezer burn and keeps them fresh.
Pro tip: Let frozen ones sit at room temperature for 2-3 minutes before eating. This gives the perfect texture.
How Long They Last
Knowing chocolate banana shelf life helps you plan. In the fridge, they last up to three days. The bananas stay fresh, and the chocolate is perfect.
In the freezer, they last up to two months. They taste amazing even after eight weeks. Proper wrapping is the secret.
Always check for freezer burn or off smells before eating. Fresh chocolate covered bananas should smell sweet and chocolatey.
"The secret to great entertaining is having delicious treats ready when you need them most."
It's always worth making a big batch and storing them right. You'll be glad when you have treats ready for guests or cravings!
Serving Ideas and Presentation
Creating memorable moments with chocolate covered bananas is all about presentation! Seeing people's faces light up when they see these treats is amazing. The right presentation can turn simple snacks into unforgettable desserts.
Whether it's a casual get-together or an elegant dinner, presentation matters. Here are some of my favorite ways to showcase these treats!
Party and Event Presentation
For party desserts presentation, I go big and bold! Use tall glass vases or hurricane glasses to display them. This height adds drama and grabs everyone's attention.
Tiered serving trays are also great. Place different chocolates on each level for a stunning effect. This is perfect for photos!
My favorite party trick is a "build-your-own" station. Guests love making their own treats. Offer toppings like nuts, sprinkles, and coconut flakes for fun.
Gift Packaging Ideas
These treats make perfect chocolate banana gifts! Package them in clear bags with colorful ribbons. For teacher appreciation, add cute tags.
Gift boxes are also great. Line a box with parchment paper and arrange the bananas inside. Add tissue paper and a bow for a gourmet gift.
For holidays, use themed packaging. Halloween gets orange and black, while Christmas gets red and green. This makes the gifts extra special.
Pairing with Other Desserts
Smart dessert pairing ideas can make your spread stand out! Try pairing them with fresh strawberries for a stunning fruit and chocolate board. The colors look amazing together.
Pair them with vanilla ice cream for a fancy sundae. The cold ice cream and rich chocolate are a perfect match. Add caramel sauce for a dessert masterpiece!
For elegant dinner parties, arrange them with other desserts like chocolate truffles and mini cheesecakes. The variety keeps guests interested, and the bananas always go first!
Nutritional Benefits and Healthier Alternatives
Chocolate-dipped bananas are not just tasty treats. They're also nutritious snacks that fit well into a healthy diet. Enjoying something sweet can also give your body good nutrients. Let's see why these healthy chocolate snacks are great for your balanced diet.
Health Benefits of Bananas
Bananas are full of amazing banana nutrition benefits. They're packed with nutrients in their sweet, creamy flesh.
Here's what makes bananas special:
- Potassium - supports heart health and muscle function
- Vitamin B6 - boosts brain function and mood
- Fiber - aids digestion and keeps you feeling full
- Natural sugars - provide quick, sustained energy
- Antioxidants - fight inflammation and support immunity
I always say bananas are nature's energy bars. They're perfectly packaged to fuel your day!
Dark Chocolate Health Benefits
Choosing dark chocolate with 70% cacao or higher gives you amazing health benefits. Dark chocolate is not just a treat. It's actually good for you!
The magic is in these compounds:
- Flavonoids - powerful antioxidants that protect your cells
- Heart-healthy compounds - may help lower blood pressure
- Mood boosters - naturally increase feel-good chemicals
- Brain support - improve cognitive function and memory
Stick with quality dark chocolate for the best nutritional benefits!
Sugar-Free and Vegan Options
Everyone can enjoy these treats, no matter their diet! Sugar-free chocolate treats work great in this recipe without losing taste or texture.
For sugar-free versions, try:
- Sugar-free chocolate chips (stevia or monk fruit sweetened)
- Unsweetened cocoa powder with natural sweeteners
- Dark chocolate sweetened with dates or maple syrup
Vegan friends can make these treats plant-based! Use dairy-free chocolate and coconut oil instead of butter. The result is creamy and delicious.
Portion Control Tips
Enjoying these treats without guilt? Smart portion control is the key! Here's how I do it:
Try these portion-friendly ideas:
- Mini banana coins - slice bananas into rounds instead of halves
- Thin chocolate coating - less chocolate, more banana flavor
- Share the batch - make treats for friends and family
- Freeze individually - grab one when cravings hit
Remember, these are treats to enjoy mindfully. Don't feel guilty about them. Everything in moderation – including moderation itself!
Conclusion
You now have all the tools and knowledge to create these delightful treats! Making chocolate-covered bananas is the best of easy homemade desserts. It uses simple ingredients, takes little time, and brings great satisfaction.
The path to chocolate banana recipe success is all about embracing the process. Don't worry if your first batch isn't perfect! Each attempt teaches you something new about chocolate consistency, banana ripeness, or creative topping combinations.
This recipe is special because it's so flexible. You can dress them up for elegant dinner parties or keep them casual for family movie nights. The simple treat making process means you'll never be far from a delicious snack that everyone loves.
I encourage you to get creative with your flavor combinations. Try crushed pretzels for salty-sweet contrast, or drizzle white chocolate over dark for an elegant finish. The beauty of these treats is that there's no wrong way to make them!
Remember to store your finished bananas properly to maintain that perfect chocolate snap. Whether you're making them for yourself or sharing with loved ones, these chocolate-dipped delights bring joy to any occasion.
Start with the basic recipe, then let your imagination run wild. Your kitchen adventure with chocolate-covered bananas is just beginning!