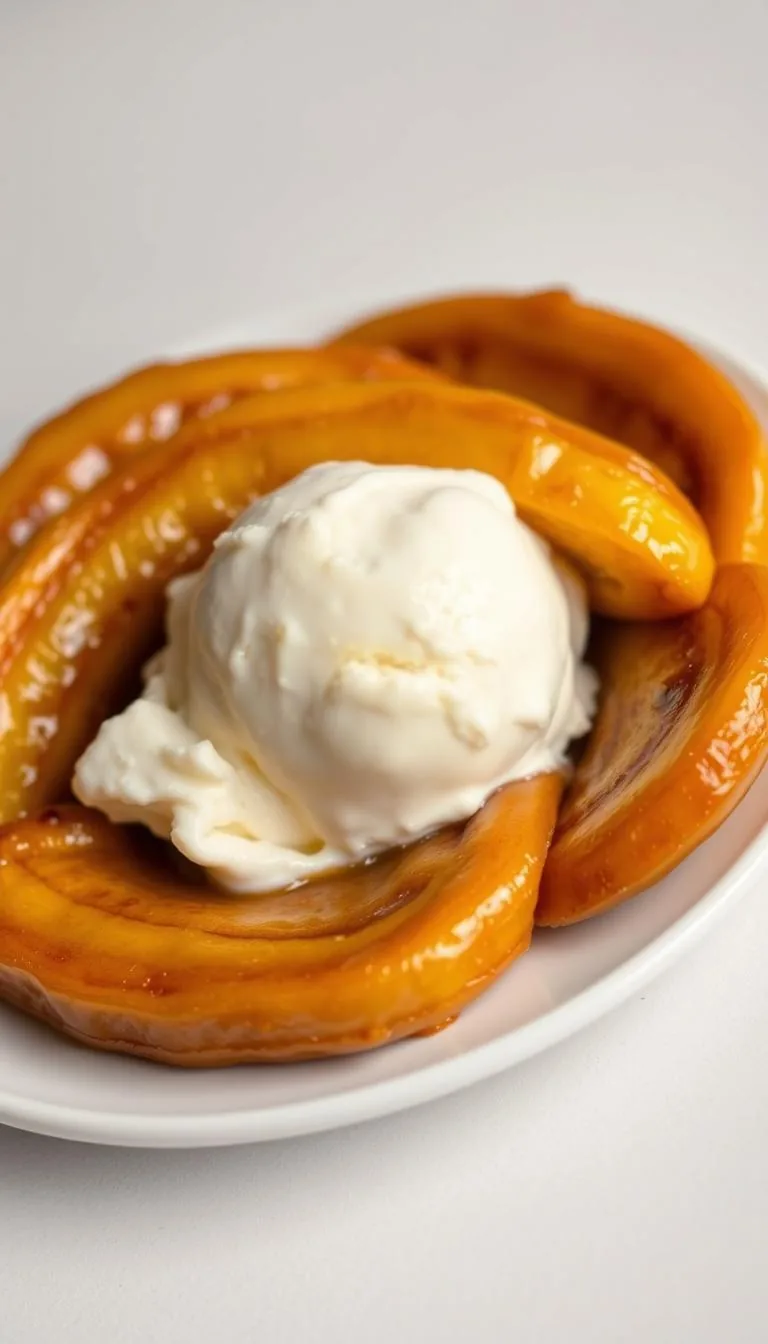
Welcome to one of my absolute favorite treats that always impresses! This caramelized bananas dessert is a bowl of pure magic. It features perfectly golden, buttery fruit in rich caramel sauce.
This 15-minute dessert is perfect for when guests show up unexpectedly. I love how simple ingredients turn into something fancy!
The mix of warm, sweet fruit and cold vanilla ice cream is amazing. Your taste buds will love it! Once you learn this easy trick, you'll make this quick dessert recipe over and over.
Key Takeaways
- Ready in just 15 minutes using simple pantry ingredients
- Perfect temperature contrast between warm fruit and cold ice cream
- Transforms everyday ingredients into restaurant-quality treats
- Ideal for unexpected guests or spontaneous cravings
- Easy technique that beginners can master quickly
- Uses basic kitchen tools you already have at home
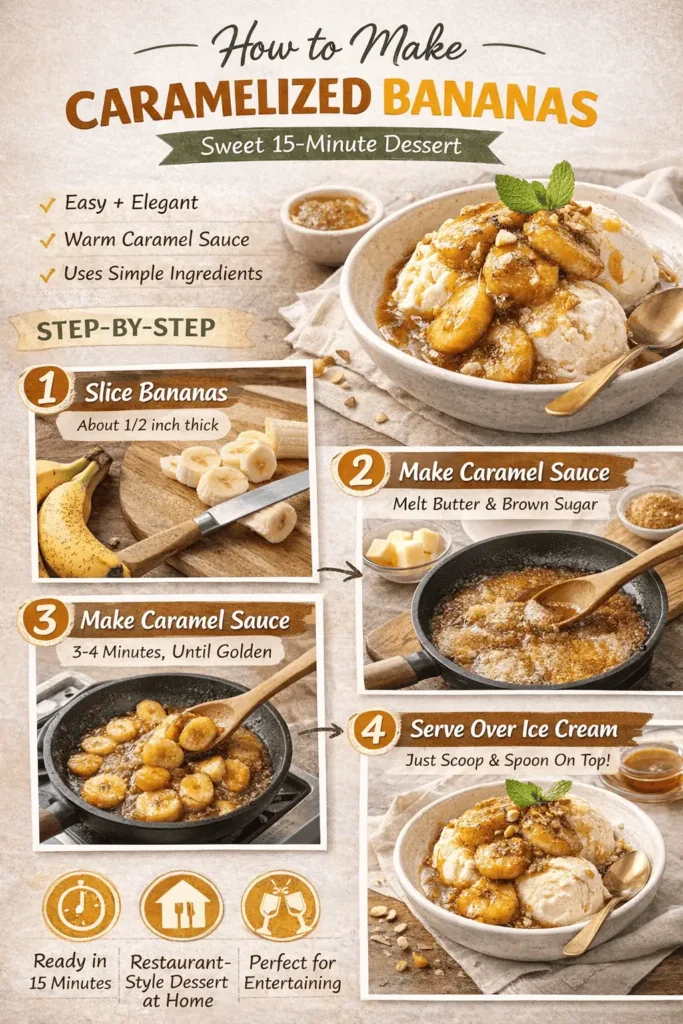
Essential Ingredients for Perfect Caramelized Bananas
The secret to an amazing banana dessert is in the ingredients. Quality matters a lot. The right bananas, butter, and sugar are key to success.
Choosing the right caramel ingredients is important. Each one adds to the flavor. Let me show you what to look for!
Selecting the Right Bananas for Caramelization
Choosing the right bananas is critical. Look for bananas that are ripe but firm. They should have a yellow skin with a few brown spots.
Here's what to look for in bananas:
- Yellow skin with minimal brown spots
- Firm texture that doesn't give too much when pressed
- Sweet aroma without being overpowering
- No soft or mushy areas
Avoid soft bananas. They turn mushy when cooked. The perfect banana will keep its shape and soak up caramel flavors.
Choosing Quality Butter and Sugar
Use unsalted butter for better control over sweetness. It lets the banana flavor shine. You can also adjust the salt to taste.
For sugar, you have options:
- Granulated white sugar - creates a clean, sweet caramel
- Brown sugar - adds deeper, richer caramel notes
- Raw sugar - provides subtle molasses undertones
Brown sugar is my favorite. It adds a deep caramel flavor. The molasses gives a complex taste that pairs well with bananas.
Best Ice Cream Flavors for Pairing
The right ice cream is key for a great ice cream topping. Vanilla is classic and always a good choice. It complements the bananas without overpowering them.
Try these flavor combinations:
- Vanilla - the perfect classic pairing
- Caramel swirl - doubles down on that caramel goodness
- Butter pecan - adds nutty richness
- Cinnamon - creates warm, spiced notes
- Salted caramel - balances sweet with savory
Don't be afraid to try new flavors! I've found amazing combinations. The goal is to find ice cream that enhances the caramel and banana flavors.
Required Kitchen Tools and Equipment
Good news - you likely have everything you need in your kitchen! This dessert is simple to make. Most people can make caramelized bananas with basic cooking equipment they already have.
Having the right kitchen tools makes preparing your dessert easy and stress-free. This recipe goes fast once you start. So, gather everything you need before you begin!
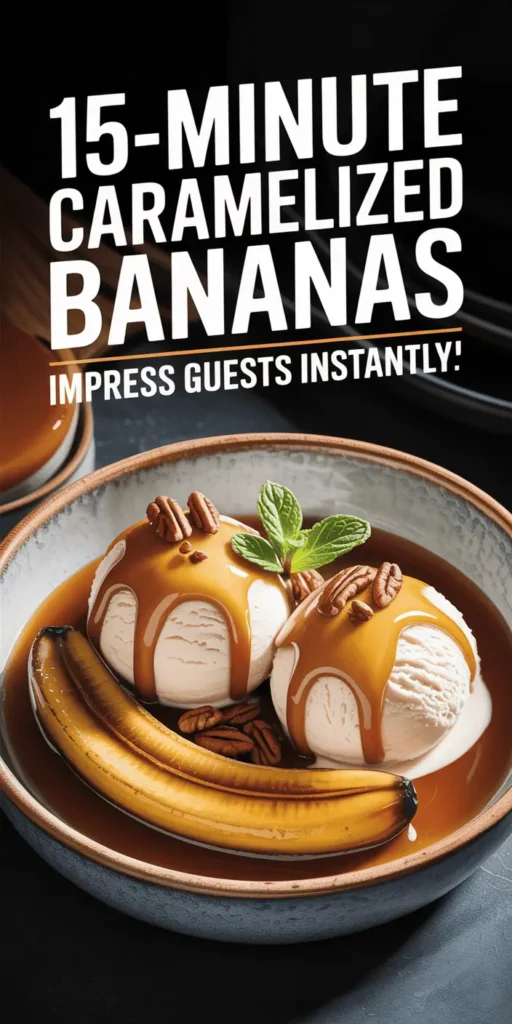
Essential Cookware for Caramelization
The key piece of your cooking equipment is a heavy-bottomed skillet or sauté pan. I like a 10-12 inch pan for even heat. This size lets your bananas cook well without crowding.
Non-stick pans are great for beginners. But, a well-seasoned cast iron or stainless steel pan gives better caramelization. The heavy bottom prevents hot spots that can burn your caramel.
"The right pan makes the difference between perfect caramel and a sticky mess - invest in quality cookware and your desserts will thank you."
Helpful Utensils and Accessories
Your kitchen tools need just a few important items. A wooden spoon or silicone spatula is best for stirring. They won't scratch your pan and help you control the caramelization.
Keep a sharp knife ready for slicing bananas evenly. Uniform slices cook at the same rate. This prevents some pieces from burning while others stay undercooked.
Don't forget measuring cups and spoons for exact ingredient ratios. An ice cream scoop makes serving easier. It creates those perfect, restaurant-style scoops that look amazing on your plates.
Having everything ready before you start makes your dessert preparation enjoyable. Trust me - you don't want to scramble for tools while your caramel is bubbling away!
Preparing Your Ingredients Step by Step
Getting your ingredients ready beforehand makes this simple dessert a breeze to make. Proper ingredient prep is key for caramelized bananas that are perfect every time. When everything is measured, sliced, and organized, you can focus on cooking without stress.
The French concept of mise en place is perfect for this dessert. Having all your ingredients ready means you won't burn your caramel or overcook your bananas. You'll be able to cook smoothly without any last-minute rushes.
Proper Banana Slicing Techniques
Banana preparation starts with the right cutting technique. Slice your bananas into rounds that are about ½-inch thick. This thickness helps them caramelize beautifully while keeping their shape.
I prefer cutting them diagonally instead of straight across. The diagonal cuts make the bananas look elegant and oval-shaped. They also catch more caramel, adding more flavor to each bite.
Make sure your bananas are just ripe. They should give slightly when you press them but hold their shape when sliced.
Measuring and Organizing Ingredients
Smart mise en place is essential! Measure out your butter and sugar ahead of time. Usually, 2-3 tablespoons of each are perfect for 2-3 bananas. I put them in separate small bowls next to my stovetop.
Gather any additional flavorings you plan to use. If you're adding vanilla extract, cinnamon, or a splash of rum, measure these out too. Having everything within arm's reach prevents frantic searching while your caramel is bubbling away!
| Ingredient | Amount for 2-3 Bananas | Prep Method | Storage Until Use |
|---|---|---|---|
| Butter | 2-3 tablespoons | Cut into small cubes | Room temperature bowl |
| Brown Sugar | 2-3 tablespoons | Measure and level | Small prep bowl |
| Bananas | 2-3 medium | Slice ½-inch diagonal | Plate near stovetop |
| Vanilla Extract | ½ teaspoon | Measure in small spoon | Next to other ingredients |
Getting Ice Cream Ready to Serve
Don't forget about your ice cream during prep! Take it out of the freezer about 5 minutes before you start cooking. This makes scooping easier and adds a nice temperature contrast with the warm bananas.
Pre-warm your serving bowls if you want to go the extra mile. Just run them under warm water and dry them completely. This keeps everything at the perfect serving temperature for longer!
I always keep my ice cream scoop in a glass of warm water. It glides through even the firmest ice cream like butter, giving you perfect, round scoops that make your dessert look restaurant-worthy!
Creating the Perfect Caramel Base
Get ready to turn simple butter and sugar into liquid gold. This is where your homemade caramel dreams come true. The secret is patience, proper temperature control, and watching for color changes.
Making exceptional caramel sauce from scratch is easier than you think. Just follow these three steps carefully. Each step adds to the rich, buttery flavor we all love!
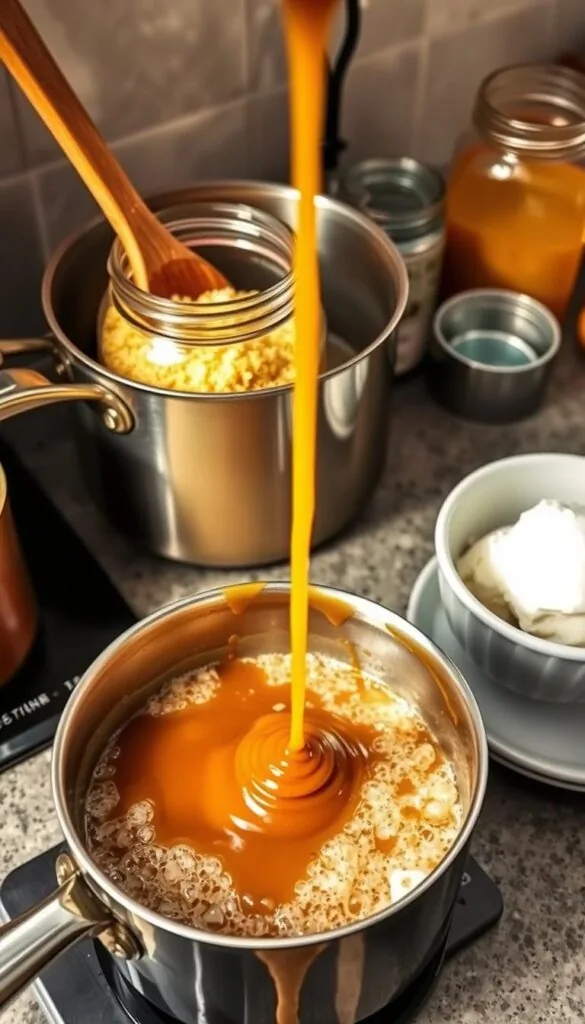
Step 1: Melting Butter Properly
Start by placing your butter in a heavy-bottomed saucepan over medium heat. Never use high heat to avoid burnt caramel! Watch as the butter melts and foams.
The foaming is normal and a good sign! Your butter will bubble enthusiastically for about a minute. Stir gently with a wooden spoon to melt evenly.
When it stops foaming and turns light golden, it's ready. This takes 2-3 minutes, depending on your stove's heat.
Step 2: Adding Sugar for Caramelization
Once your butter is golden, add the sugar evenly. Resist the urge to stir immediately!
Let the sugar sit for about 30 seconds to dissolve naturally. This prevents clumping and ensures smooth homemade caramel. You'll see the sugar melting at the edges.
Now, start stirring gently but consistently. Watch as your mixture turns into beautiful liquid caramel!
Step 3: Achieving the Right Color and Consistency
The final step is all about color and timing. Aim for a gorgeous amber hue, like golden honey.
This transformation takes 3-4 minutes of gentle stirring. Your kitchen will fill with a buttery aroma. Trust your nose! When it smells rich and nutty, you're almost there.
| Caramel Stage | Color Description | Cooking Time | What to Look For |
|---|---|---|---|
| Too Light | Pale yellow | 1-2 minutes | Lacks depth of flavor |
| Perfect | Rich amber | 3-4 minutes | Nutty aroma, smooth consistency |
| Too Dark | Deep brown | 5+ minutes | Bitter taste, burnt smell |
| Overcooked | Dark brown/black | 6+ minutes | Acrid smell, unusable |
The consistency should be smooth and pourable, like thick cream. If your caramel looks too dark or smells burnt, remove it from heat right away. You can always cook it a bit more, but you can't undo overcooking!
Cooking the Caramelized Bananas Dessert
Now, the real fun starts - adding your bananas to make this amazing warm banana dessert! Watching them turn from simple fruit to golden perfection is incredible. This step needs careful attention and timing to get the fruit tender and the caramel rich.
Success comes from knowing how bananas react with hot caramel. They sizzle and bubble, mixing their sugars with the caramel. Let's go through each step to make your caramelized banana recipe perfect!
Adding Bananas to the Caramel
This is the most exciting part! Carefully put your banana slices into the boiling caramel, one layer at a time. Don't fill the pan too much - use batches if you have many bananas.
As they hit the hot caramel, you'll hear a sizzling sound. That's when the magic starts! The bananas will begin cooking and getting their golden color.
Let them cook without stirring for 1-2 minutes on the first side. This helps them get that beautiful caramelized color. Try not to stir them too much!
Gentle Cooking for Perfect Texture
When the first side is golden, it's time to flip. Use your spatula to gently turn each slice. They should smell amazing at this point!
Cook for another 1-2 minutes on the second side. You want bananas that are tender but not mushy, with a perfect caramelized coating.
Look for the right doneness - the bananas should be tender but hold their shape. This gentle cooking method keeps them from falling apart.
Final Seasoning and Flavor Adjustments
This is when I love to add the final touches that make this caramelized banana recipe special! A pinch of salt enhances all the flavors beautifully.
Adding a splash of vanilla extract can add warmth and depth. Taste and adjust - maybe add a bit more sugar if the bananas were tart.
A squeeze of fresh lemon juice can brighten everything up. These final touches turn good cooking bananas into an incredible dessert that everyone will love!
Mastering Temperature Control and Timing
Getting the heat right is key to making amazing caramelized bananas. Temperature control is what turns a good dessert into a great one. I'm here to share the top cooking techniques for perfect results every time.
Understanding how heat affects your caramel and bananas is essential. Too much heat can make them taste bitter. Too little won't give you that beautiful caramelization we all love.
Heat Management Techniques
Medium heat is your best friend for caramelized bananas! Start your burner at medium and adjust as needed. High heat can burn your caramel before the bananas are cooked right.
Keep an eye on your caramel as it develops. If it's getting too dark, don't worry! Just reduce the heat or take the pan off the burner for a few seconds. You're in complete control of the process.
Try the "hand test" to check your pan's temperature. Hold your hand about 6 inches above the surface. You should feel gentle, steady warmth, not intense heat.
Recognizing Perfect Doneness
Perfect caramelized bananas have a golden-brown exterior that looks like a glossy glaze. They should yield slightly when pressed gently with a spoon but hold their shape well.
The caramel should coat each banana slice evenly. It should be like a lovely amber syrup consistency. This is when your temperature control skills really shine!
Test doneness by lifting a banana slice with your spoon. It should bend slightly but not break apart. The caramel should drip slowly and smoothly back into the pan.
| Heat Level | Caramel Result | Banana Texture | Best For |
|---|---|---|---|
| Low Heat | Pale, no caramelization | Firm, undercooked | Warming pre-cooked bananas |
| Medium Heat | Golden amber perfection | Tender but holds shape | Perfect caramelized bananas |
| High Heat | Dark, bitter, burnt | Mushy exterior, raw center | Avoid completely |
| Medium-High | Quick browning | Uneven cooking | Advanced cooks only |
Avoiding Common Cooking Mistakes
Using overripe bananas is a big mistake. They fall apart instantly! Choose bananas with just a few brown spots for the best results.
Another common error is cooking on too high heat. This creates burnt caramel that tastes bitter and ruins your entire dessert. Remember, patience pays off with these cooking techniques!
Don't overcook your bananas until they're mushy. The residual heat continues cooking them even after you remove the pan from heat. Err on the side of slightly underdone to avoid overcooking.
Here's a key dessert tip - never walk away from your pan! Caramelization happens quickly, and staying present ensures perfect results every time.
Creative Variations and Flavor Enhancements
Now it's time to add your own twist to make dessert variations that will impress everyone! This recipe is like a blank canvas, ready for your favorite flavors. It's a chance to turn simple caramelized bananas into a gourmet dessert masterpiece.
Whether you're having a dinner party or treating yourself, these creative touches will make your dessert stand out. Let's dive into the world of flavored caramel and see how small changes can make a big difference!
Spice Additions: Cinnamon, Nutmeg, and Vanilla
Spices can work magic, adding warm, complex flavors to your caramelized bananas. A pinch of cinnamon can turn this dessert into a cozy fall treat.
Nutmeg adds a sophisticated touch that guests will love but can't quite put their finger on. Just a small amount, about 1/8 teaspoon, is enough. For vanilla fans, add pure vanilla extract at the end to keep its delicate flavor. This simple step makes everything taste more luxurious.
Pro tip: Toast whole spices like cinnamon sticks in your pan before adding butter for an even deeper flavor.
Liqueur Options: Rum, Bourbon, and Brandy
Want to make an elegant adult dessert? Adding a splash of liqueur can turn your caramelized bananas into a top-notch dessert variation for special events! Dark rum pairs well with bananas, adding a tropical touch.
Bourbon brings smoky notes that complement the caramel perfectly. Brandy adds sophisticated fruitiness, making it feel like a fancy French dessert. Add 2-3 tablespoons of your chosen liqueur to the caramel and cook for about 30 seconds to keep the flavors.
The key is timing - add liqueur after the bananas are tender but before serving for the best flavored caramel results!
Texture Additions: Nuts, Coconut, and Toppings
Texture makes desserts exciting! Toasted pecans or walnuts add a delightful crunch that contrasts with the soft bananas. Simply toast them in a dry pan for 2-3 minutes until fragrant, then sprinkle over your finished dessert.
Shredded coconut brings tropical vibes - try toasting it lightly for extra flavor! For chocolate lovers, a drizzle of warm chocolate sauce creates an indulgent gourmet dessert experience.
Don't forget about finishing touches! A sprinkle of flaky sea salt enhances all the flavors, while crushed amaretti cookies or graham crackers add wonderful texture. Fresh mint leaves provide a pop of color and refreshing contrast to the rich caramel.
The best part? You can mix and match these additions to create your signature version that guests will remember long after the last bite!
Serving Techniques and Presentation
How you present your caramelized bananas dessert can make it look like a fancy restaurant dish! Professional dessert presentation is easy. You just need to know a few key tips to make your dessert look as good as it tastes.
Temperature contrast is key. The warm caramelized bananas and cold ice cream create a unique experience. It's more than just taste.
Proper Assembly and Plating Methods
Start with chilled bowls or plates. This keeps your ice cream from melting fast. I chill my serving dishes in the freezer for 10 minutes before plating. This gives you time to create beautiful presentations without rushing.
Scoop your ice cream first, making a mound in the center of each bowl. Don't worry about making it perfect. Rustic charm works well with this dessert! Use an ice cream scoop that's been dipped in warm water for cleaner, rounder scoops.
Now, the fun part! Use a large spoon to arrange the warm caramelized bananas around and over the ice cream. These plating techniques are important: overlap the banana slices slightly. Drizzle the caramel sauce over everything. The sauce should pool around the ice cream and cascade down the sides.
Garnishing for Visual Appeal
Fresh mint leaves add color and a fresh note that complements the sweetness. Just 2-3 small leaves per serving adds elegance. The contrast of green against the golden caramel is stunning!
A light dusting of powdered sugar adds elegance and a professional finish. Use a fine-mesh sieve for an even coating. You can also try fresh berries for color contrast - strawberries or raspberries work well.
For special occasions, add a small cookie or wafer stick for extra texture and height. Creative serving suggestions like these make your dessert memorable. Guests will talk about it long after dinner!
Serving Temperature Guidelines
Serve immediately while the bananas are warm - that temperature contrast is divine! The caramel should be flowing slightly, not thick or cooled.
If timing is important, keep the caramelized bananas warm in the pan on very low heat for a few minutes. Just don't let them sit too long or they'll become mushy and lose their texture.
The ideal serving temperature for the caramelized bananas is 140-150°F. This keeps the contrast between warm and cold perfect. Getting this balance right makes all the difference!
Remember, dessert presentation is about creating an experience, not just serving food. Take that extra moment to wipe the rim of the bowl clean and arrange everything thoughtfully. Your guests will notice the care you put into every detail!
Conclusion
This easy dessert recipe shows that the best treats come from simple ingredients. You've learned how to make restaurant-quality caramelized bananas. These will impress everyone without much effort.
This dessert is versatile. It's perfect for dinner parties or a treat after a long day. The warm caramel and cold ice cream make a great contrast.
Making this recipe boosts your kitchen confidence. Each time, you'll find new flavors and techniques. You might even add vanilla extract or toasted nuts!
You likely have most ingredients at home. Just bananas, butter, sugar, and your favorite ice cream. This makes something magical.
So, grab your skillet and start cooking! Your taste buds and anyone you share it with will be grateful. This dessert is my favorite for quick, special moments. Happy cooking!